Selection and Selection Manager
bg2 engine incorporates an element selection system in the scene via mouse, which is divided into three parts:
-
Selection Manager: responsible for managing scene element selection, handling multi-selection capabilities, and processing mouse clicks to trigger the selection process. In the selection manager we’ll configure things like the selection operation mode (by object or by PolyList)
-
Selection Highlight: responsible for marking selected elements in the scene
-
Scene selectable elements: The selectable elements are
PolyList. Previously we talked about how in bg2 engine drawable scene elements are composed of differentPolyList, and these elements would correspond to a submesh in a modeling program. ThePolyListobjects also store aselectableproperty that indicates whether that element can be selected
1. Initial Project
Section titled “1. Initial Project”In this case, we’ll start from the react_integration project so we can create a user interface to interact with selection. Copy the project and name it selection, and also change the package name in package.json.
Let’s start by modifying the React interface to add the options we’ll use in the example:
App.tsx
import SelectionMode from 'bg2e-js/ts/manipulation/SelectionMode.ts';...export default function App() {  const [selection, setSelection] = useState<string[]>([]);  const [selectionMode, setSelectionMode] = useState<SelectionMode>(SelectionMode.POLY_LIST);  const [selectionEnabled, setSelectionEnabled] = useState<boolean>(true);
  useBg2e(    "#bg2eCanvas",    WebGLRenderer,    MyAppController,    (_: Canvas, mainLoop: MainLoop) => {      mainLoop.updateMode = FrameUpdate.MANUAL;    }  );
  const handleClearSelection = () => {
  }
  const handleSelectionModeSwitch = () => {
  }
  const handleSelectionToggle = () => {
  }
  const handleMultiSelectChange = () => {  }
  return (    <>      <div className="ui">        <h1>Selection:</h1>        <ul>          {selection.map((item, index) => (            <li key={index}>{item}</li>          ))}        </ul>        <div className="buttons">          { selection.length > 0 && <button onClick={handleClearSelection}>Clear Selection</button> }          <button onClick={handleSelectionModeSwitch}>            Switch Mode: {selectionMode === SelectionMode.POLY_LIST ? "Poly List" : "Object"}          </button>          <button onClick={handleSelectionToggle}>{ selectionEnabled ? "Disable" : "Enable" } Selection</button>          <button onClick={handleMultiSelectChange}>Multi Select</button>      </div>      </div>    </>  )}
Now we’ll update the CSS files:
index.css
:root {  font-family: system-ui, Avenir, Helvetica, Arial, sans-serif;  line-height: 1.5;  font-weight: 400;
  font-synthesis: none;  text-rendering: optimizeLegibility;  -webkit-font-smoothing: antialiased;  -moz-osx-font-smoothing: grayscale;}
a {  font-weight: 500;  color: #646cff;  text-decoration: inherit;}a:hover {  color: #535bf2;}
body {  margin: 0;  padding: 0;
  min-width: 100vw;  min-height: 100vh;}
App.css
#root { max-width: 1280px; margin: 0 auto; padding: 2rem; z-index: 1; position: absolute; pointer-events: none;}
.ui { display: flex; flex-direction: column;}
h1 { margin: 0; padding: 0;
a,button { pointer-events: auto;}
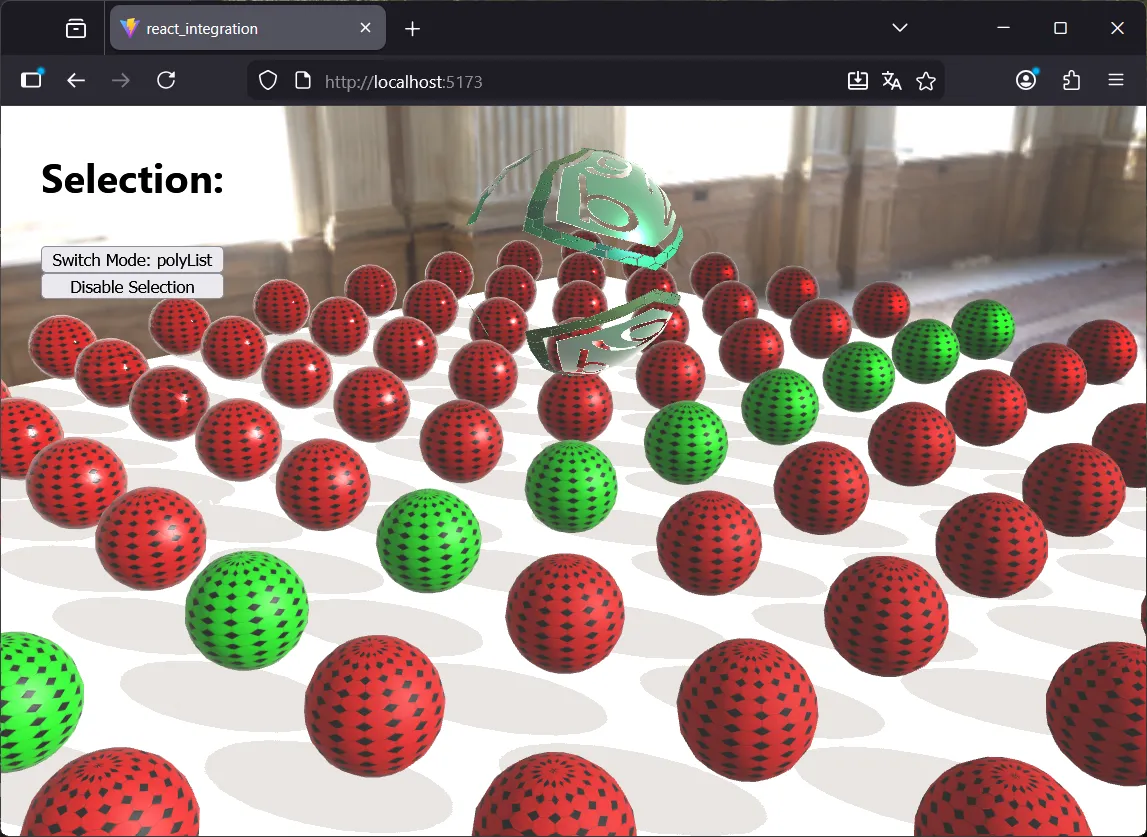
.buttons { display: flex; flex-direction: column;}With these changes, the application should have this appearance:
2. Selection Manager
Section titled “2. Selection Manager”The Selection Manager is available through SceneAppController. At the moment of application construction we have to decide whether we want to load or not the selection manager. By default it’s always loaded. When we have the selection manager enabled, every time we click on the canvas a event is processed to find objects to select. If we’re clear that the application won’t use selection, we can disable it by implementing the following property in our AppController:
class MyAppController extends SceneAppController { get selectionManagerEnabled() { return false; } ...}In our case we don’t need to do anything: the selection manager will be enabled by default. In fact, you can already try to select elements and you’ll see they’re marked with a blue border.
2.1. Selection Manager Configuration
Section titled “2.1. Selection Manager Configuration”In the async loadDone() function of SceneAppController the SelectionManager object is already constructed. We can use this function to configure it. It’s available through the selectionManager property. The first thing we’re going to do is register a callback to keep track of the objects that are selected.
AppController.ts
...import { type SelectionChangedData } from "bg2e-js/ts/manipulation/SelectionManager.js";...export default class MyAppController extends SceneAppController {
  ...  async loadDone() : Promise<void> {    if (this.selectionManager) {      this.selectionManager.onSelectionChanged("selectionCallback", (selection: SelectionChangedData[]) => {        console.log("Selection changed:", selection);      });    }  }}
Now when we select an object we’ll see the selection information in the terminal.
The problem is that if we want to keep track of the selected objects to display them in React, adding a callback in our AppController won’t be much help. To access this part from React we can use the initialization callback of the useBg2e hook:
App.tsx
const { mainLoop } = useBg2e( "#bg2eCanvas", WebGLRenderer, MyAppController, (_: Canvas, mainLoop: MainLoop) => { mainLoop.updateMode = FrameUpdate.MANUAL; const appCtrl = mainLoop.appController as MyAppController; appCtrl.selectionManager?.onSelectionChanged("reactSelectionCallback", (selectedItems: SelectionChangedData[]) => { setSelection(() => selectedItems.map(item => item.drawable.node.name)); }); });Notice how now in addition to keeping track of the selected objects, we can still see the log printed by the callback we added in our app controller in the debug console. The onSelectionChanged function allows us to add as many callbacks as we want. That’s why the first parameter is a callback identifier: if we want to replace one callback with a new one, we just need to call onSelectionChanged using the same identifier. But if the identifier we use is different, then we’ll register a new callback.
2.2. Interaction with the selection manager
Section titled “2.2. Interaction with the selection manager”We’re going to implement the button action handleClearSelection now. In pure React code, here we would simply update the state. In this case it’s not necessary: what we’ll do is clear the selection in the Selection Manager, and that will trigger a call to the selection callbacks, which indirectly will update the state.
const handleClearSelection = () => { const appController = mainLoop?.appController as MyAppController; appController.selectionManager?.clearSelection();}2.3. What happens with the spheres?
Section titled “2.3. What happens with the spheres?”We’ve already mentioned this in previous chapters, but basically when we select a sphere we’re seeing that all are selected. The problem is that we’re reusing the Sphere’s PolyList to draw all of them. The selection properties, the polyList name and other properties are saved in the same PolyList object, so if we need to interact with these objects independently, we can’t reuse the same one for all the spheres:
AppController.ts
...export default class MyAppController extends SceneAppController {  // private _spherePlist: PolyList | null = null; We no longer need this
  private async createSphereNode({    name,    roughness,    metalness,    albedo = new Color([0.85, 0, 0, 1]),    albedoTexture,    normalTexture,    position = [0, 0, 0]  } : {    name: string,    roughness: number,    metalness: number,    albedo?: Color,    albedoTexture?: string,    normalTexture?: string,    position: number[]  }) : Promise<Node> {    const sphereNode = new Node(name);    const plist = createSphere(0.2);    sphereNode.addComponent(new Drawable())    sphereNode.drawable?.addPolyList(plist, await Material.Deserialize({      albedo, roughness, metalness, albedoTexture, normalTexture    }), Mat4.MakeIdentity() );    sphereNode.addComponent(new Transform(Mat4.MakeTranslation(position[0], position[1], position[2])));    return sphereNode;  }}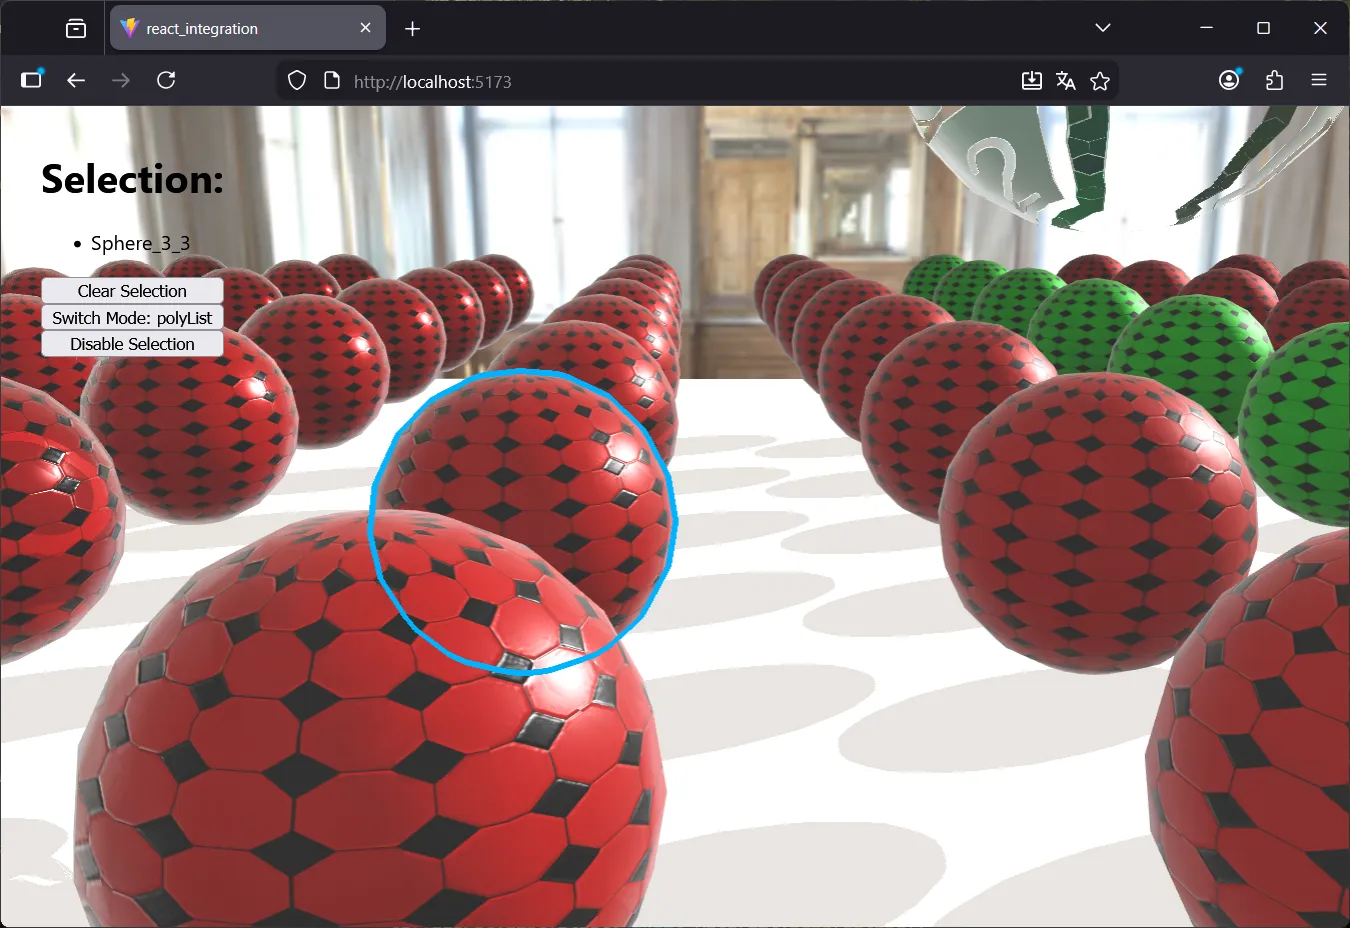
2.4. Enabling and disabling selection
Section titled “2.4. Enabling and disabling selection”The Selection Manager has one property and two functions to control its enabled state:
-
enabled(read/write): allows enabling or disabling selection -
enable(): enables selection -
disable(): disables selection
When we disable the Selection Manager, the selection is automatically cleared, and if there were selected objects it’ll also call the selection callback to notify the listening objects that the change has occurred
We’re going to implement handleSelectionToggle:
App.tsx
const handleSelectionToggle = () => { const appController = mainLoop?.appController as MyAppController; setSelectionEnabled(prev => { if (prev) { appController.selectionManager?.disable(); } else { appController.selectionManager?.enable(); } return !prev; })}2.5. Selection mode
Section titled “2.5. Selection mode”The Selection Manager can function in two ways:
-
PolyList selection: allows selecting submeshes of objects
-
Object selection: selects the entire drawable
To change the selection mode we use the Selection Manager’s setSelectionMode() function:
const handleSelectionModeSwitch = () => { const appController = mainLoop?.appController as MyAppController; const newMode = selectionMode === SelectionMode.POLY_LIST ? SelectionMode.OBJECT : SelectionMode.POLY_LIST;
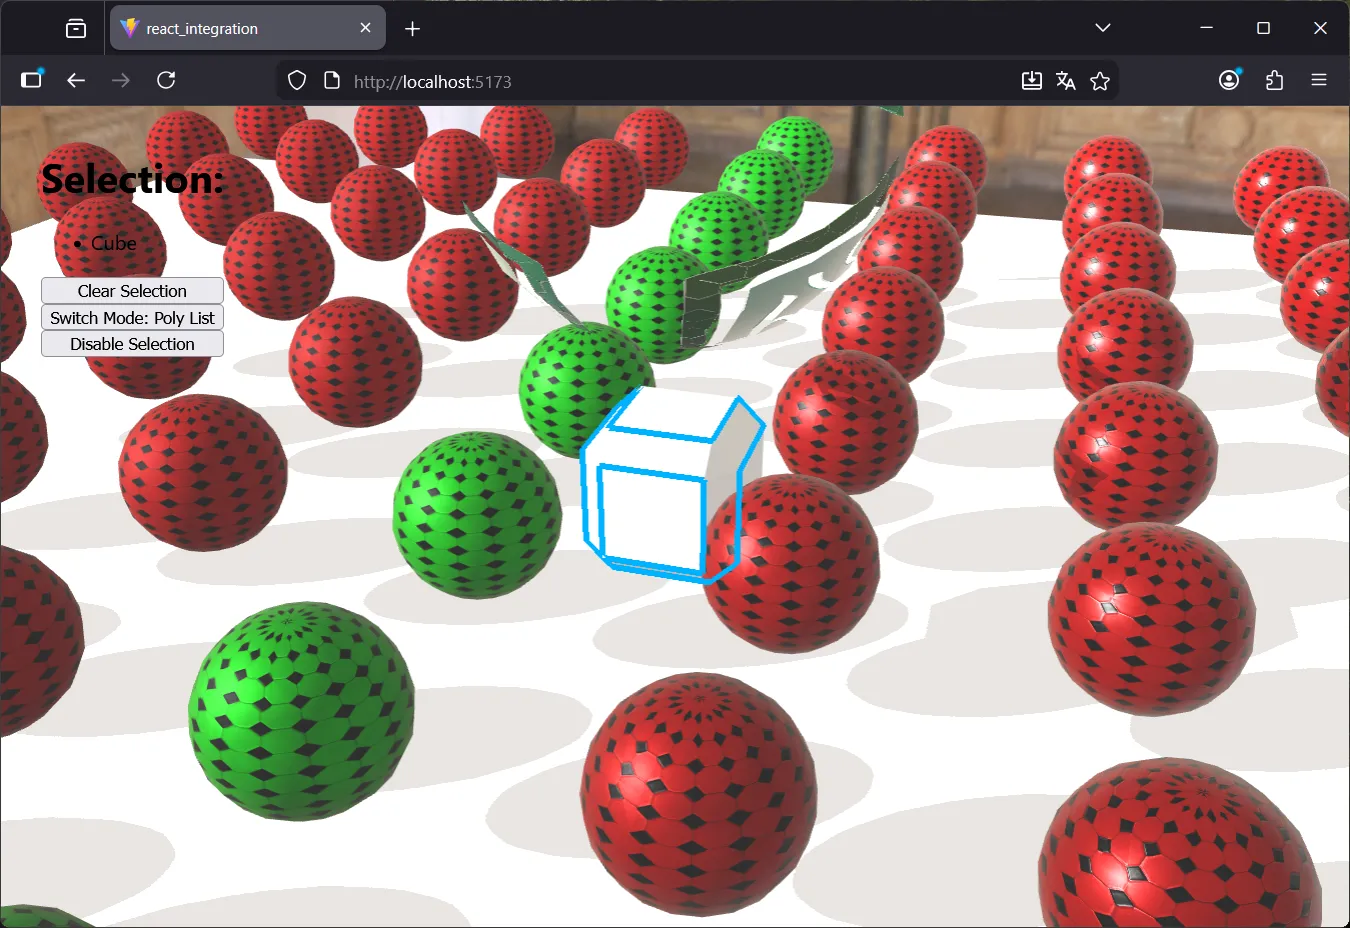
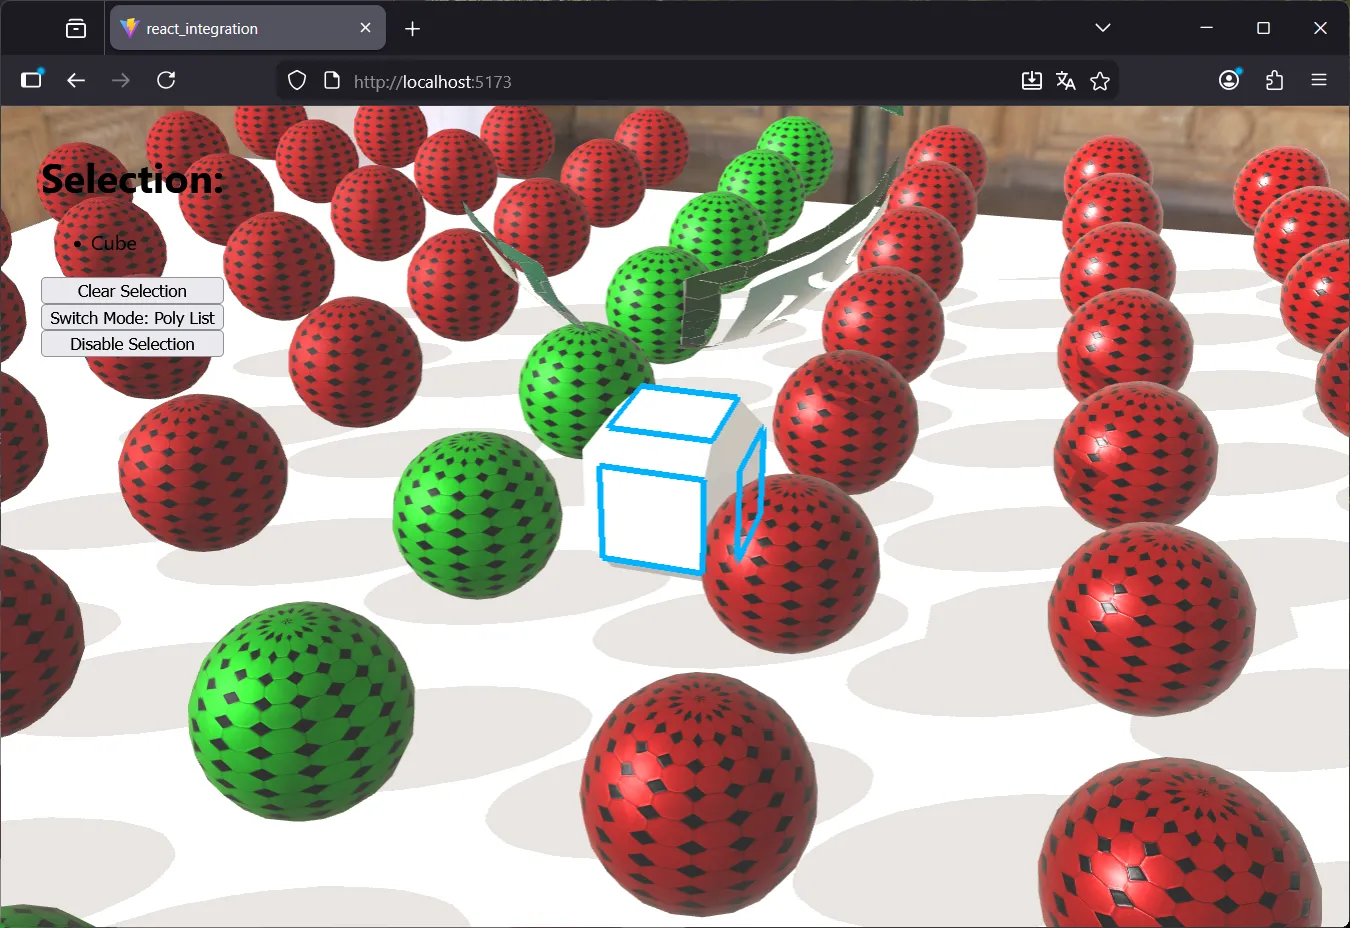
setSelectionMode(newMode); appController?.selectionManager?.setSelectionMode(newMode);}The problem is that all the scene elements we have have a single polyList. To see the difference we’ll need to load a model that has more elements.
In the bg2 engine repository’s samples/resources folder we have an OBJ format model that has two submeshes. Let’s take the opportunity to see how to load Drawable objects from a 3D model, we’ll also see how to register the OBJ format plugin, and along the way we’ll see how selection works in object mode.
First, locate the simple_cube.obj file and copy it to the public directory of the selection project.
Now let’s modify the loadScene() function of our app controller:
...import Loader, { registerLoaderPlugin } from "bg2e-js/ts/db/Loader.js";import ObjLoaderPlugin from "bg2e-js/ts/db/ObjLoaderPlugin.js";
...
  async loadScene() {    const sceneRoot = new Node("Scene Root");
    registerLoaderPlugin(new ObjLoaderPlugin());    const loader = new Loader();
    const cubeDrawable = await loader.loadDrawable("./simple_cube.obj");    const cubeNode = new Node("Cube");    cubeNode.addComponent(new Transform(      Mat4.MakeIdentity()        .translate(0, 0.5, 0)        .scale(0.2, 0.2, 0.2)    ));    cubeNode.addComponent(cubeDrawable);    sceneRoot.addChild(cubeNode);    ...  }
This model is made up of two pieces: the outline of edges, and the center. In PolyList mode we can select each piece separately, but if we change to Object mode, if we click on any poly list the entire object will be selected.
By default objects are selectable, so we need to keep this in mind to set to false those we don’t want. The makeSelectable function marks all polyLists, if we want to be more granular, we need to iterate over the drawable elements
const findVisitor = new FindNodeVisitor();findVisitor.name = "Ball";findVisitor.hasComponents(["Drawable"]);root.accept(findVisitor);findVisitor.result.forEach(node => { node.drawable?.makeSelectable(node.name === "Ball");});2.6. Multi selection
Section titled “2.6. Multi selection”The Selection Manager supports multi-selection. When enabled, clicking on an unselected item selects it, and clicking on a selected item removes it from the selection.
To implement the Multi Select button we need to add a state that updates the button label:
const [multiSelect, setMultiSelect] = useState<boolean>(false);...<div className="buttons"> ... <button onClick={handleMultiSelectChange}>{ multiSelect ? "Multi Select" : "Single Select" }</button></div>Now we implement the handleMultiSelectChange function:
const appController = mainLoop?.appController as MyAppController;if (appController && appController.selectionManager) { appController.selectionManager.setMultiSelectMode(!multiSelect);}setMultiSelect(prev => !prev);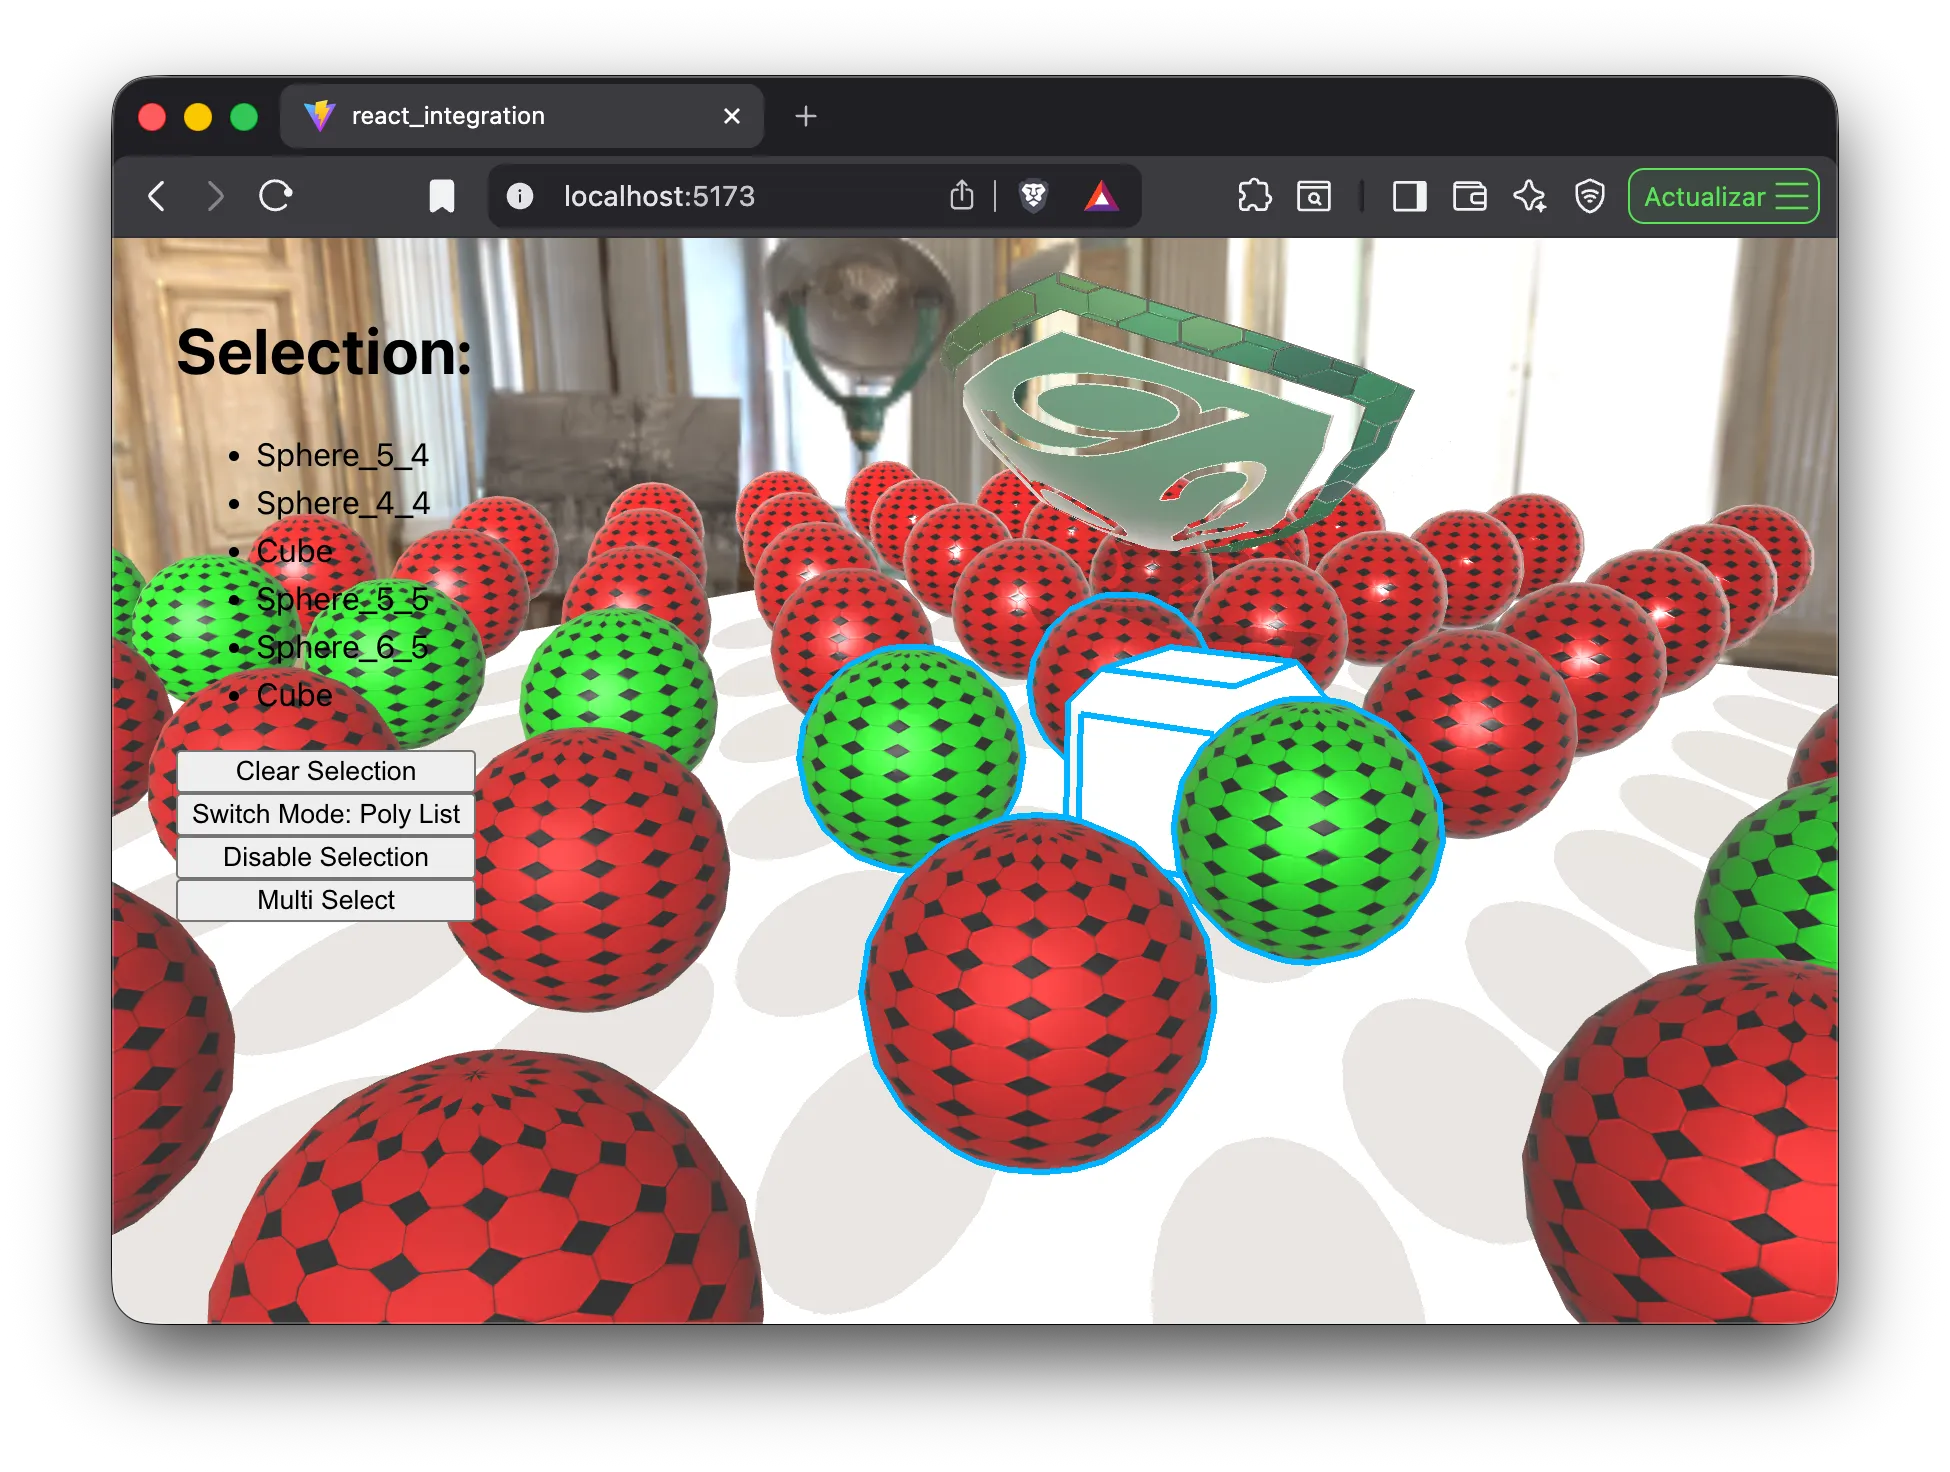
3. Selectable elements
Section titled “3. Selectable elements”3.1. Properties associated with selection
Section titled “3.1. Properties associated with selection”By default all created PolyLists are selectable. If we want a poly list to be non-selectable, we have to configure it. Specifically, a PolyList object has the following properties associated with selection:
-
selected(write): used to indicate whether we want the PolyList to be or not marked as selected. These properties shouldn’t be modified manually, it’s better to let the Selection Manager take care of changing them -
isSelected(read): indicates whether the poly list is selected or not -
isSelectable(read): indicates whether the poly list is selectable -
selectable(write): allows configuring whether the poly list is selectable or not
In addition to this, the Drawable object has a method makeSelectable(selectable: boolean) that configures all polyLists it contains with a single call.
Let’s test this by making the sphere with the bg2 engine logo non-selectable.
Option 1: modifying the PolyList directly
spherePlist.selectable = false;sphereDrawable.addPolyList(spherePlist, material, Mat4.MakeIdentity());sphere.addComponent(sphereDrawable);Option 2: invoking makeSelectable
sphereDrawable.addPolyList(spherePlist, material, Mat4.MakeIdentity());sphereDrawable.makeSelectable(false);sphere.addComponent(sphereDrawable);In this case the method doesn’t matter to us because the sphere contains a single polyList, but it won’t be the same when dealing with an object with several elements. If we need to filter which polyLists we want to be selectable, then we need to iterate over the Drawable object’s elements. The following code is an example of how we could make an element selectable based on its groupName property. It’s quite common to use this property to mark polyLists. In this case we’ll make it selectable only if its groupName matches a regular expression:
sphereDrawable.items.forEach(item => { if (/^material/.test(item.polyList.groupName)) { item.polyList.selectable = true; } else { item.polyList.selectable = false; }});Note: In version 1.4 of bg2-engine, a
Selectablecomponent was used to mark the scene elements we wanted to be selectable. In some scenes prior to version 2.0 you might find this component. Starting from version 2 this component doesn’t exist, and selection capabilities are implemented directly in the PolyLists, which makes the system more flexible, since we can decide whether an element is selectable or not at the submesh level
4. Selection Highlight
Section titled “4. Selection Highlight”It’s possible to modify the appearance of selected elements through the selectionHighlight object that’s available in SceneAppController. Basically we can change the color and the border thickness.
async loadDone() : Promise<void> {  ...
  if (this.selectionHighlight) {    this.selectionHighlight.borderColor = new Color([1, 0, 0, 1]);    this.selectionHighlight.borderWidth = 8;  }}