Scene from scratch
In the previous chapter we learned how to create a bg2 engine TypeScript project from scratch with Vite, and we used a SceneAppController class to implement a simple application that loaded a saved scene.
In this chapter we’re going to learn the structure of scenes in bg2 engine by creating a scene from scratch. For this example we’ll use three external resources extracted from the bg2e-js repository, inside the samples/resources folder:
-
mirrored_hall_4k.png: an equirectangular image for the environment. You can use another equirectangular image, but bear in mind that to load it its size has to be a power of two (for example 4096x2048 pixels). Additionally, these images are usually in HDR format, because that’s correct for PBR rendering. However, as browsers don’t support HDR image loading, you need to convert it beforehand to an 8-bit RGB format
-
logo.png: the bg2 engine logo
-
logo_nm.png: the logo normal map
-
logo_hm.png: we’ll use this image to modify the logo’s material metalness and roughness properties
-
vintage-tile1_albedo.jpeg
-
vintage-tile1_normal.jpeg
Copy the previous project to start with a base, or recreate it from scratch if you want to practice. Gather these resources and copy them to your Vite project’s public/resources folder. Replace the content of the async loadScene() function with this initial content:
async loadScene() {

  this.updateOnInputEvents = true;  this.updateInputEventsFrameCount = 120;  return await super.loadScene();}
You’ll have many unused imports, but don’t remove them for now, because some will be needed. When we finish the project you’ll have time to delete those that aren’t used.
1. Scene structure
Section titled “1. Scene structure”In the previous lesson we learned something about the basic structure of a scene. Now we’re going to look at this topic in more depth, and we’ll learn to perform some basic operations with scenes.
The first thing we need to know before we start talking about scenes is that bg2 engine uses a right-handed coordinate system with the Y axis pointing up:
-
+x: points to the right of the screen
-
+y: points up of the screen
-
+z: points out of the screen
1.1. Nodes
Section titled “1.1. Nodes”A bg2 engine scene is composed of nodes. Nodes generate a tree structure, such that a node can have children, and it can also be a child of another node.
To create a node it’s enough to create an instance of Node. The node class, defined in bg2e-js/ts/scene/Node.ts, receives a name in its constructor that serves to identify that node in the scene. The name is optional, and actually it doesn’t serve as a unique node identifier, because node names can repeat. Generally, a node’s name is only used for debugging or to display a readable name in a user interface (for example, in the scene editor)
import Node from "bg2e-js/ts/scene/Node.ts";...async loadScene() {  const sceneRoot = new Node("Scene Root");
  this.updateOnInputEvents = true;  this.updateInputEventsFrameCount = 120;  return sceneRoot;}
There are several Node properties that we’ll use frequently:
-
name(read/write): the node’s name -
enabled(read/write): indicates whether a node is enabled. If a node is not enabled it stops being processed for most actions, for example, for drawing. A disabled node also indirectly disables all the child nodes it contains -
steady(read/write): indicates whether a node is static. This property can be set totruewhen we’re sure a node won’t move inside the scene. We need to keep in mind that for a node to be truly static, its parents must also be: in the previous lesson we mentioned that transformations in a node affect its children, therefore if a static node has an ancestor that isn’t static, that node in practice won’t be static. This property only affects optimizations, but if we mark a node as static and it actually isn’t, then artifacts can be caused in rendering -
parent: (read): returns the parent node. If this property returnsnullit means the node is the scene’s root, or that the node hasn’t been added to any scene. In practice, any node whose parent isnullcan be used as a scene root, although it’s necessary to keep in mind that depending on the rendering method, the scene must meet certain requirements. For example: to render scenes with the PBR pipeline, they must contain at least one light source -
children(read): returns a list of children nodes. It’s very important to never mutate this array. To add or remove nodes, specific functions for this purpose are used
To manage a node’s children, the following functions are used:
-
addChild(node: Node): void: Adds a node to the end of the nodes list. If the node we’re adding already belonged to another node, this function will remove it from its previous parent, since a node can only have one parent -
removeChild(node: Node): void: Removes a node from the list. This function receives as a parameter the node we want to remove. If we want to find the node to remove it, we can use thechildrenarray -
haveChildren(node: Node): boolean: Returnstrueif the node passed to us belongs to the nodes list, that is, if the node passed is a child of the node where we’re invoking the function -
isAncientOf(node: Node): boolean: Returnstrueif the node passed to us is an ancestor of the node where we invoke the function. That is, it will returntrueif the node passed is parent, grandparent, or ancestor in general, of the node where we invoke the function -
emptyChildren(): void: Removes all nodes from the nodes list
It’s possible to perform more complex actions on a node’s children, but for now with these functions we’ll be able to do almost anything with a scene
To manage the components of a node, we have the following functions:
addComponent(component: Component): Component: Adds a component to the node. This function returns the same component we added in case we want to obtain a reference to the component to perform more operations on it:
const transform = node.addComponent(new Transform()) as Trasnsform;// here we can use the transform component-
component(componentId: string): Component | undefined: Returns a component belonging to a node based on its component identifier, orundefinedif no component of that type was located in the node -
removeComponent(component: Component | string): void: Removes a component from the node. We can pass it a component instance or a component identifier. If the component doesn’t exist, this function won’t fail nor produce any error or exception
1.2. Components
Section titled “1.2. Components”Nodes are the elements that give structure and organize the scene in tree form, but they don’t implement any functionality. A node’s functionality is implemented by composition, through components. A component is a class that implements a functionality. Each component has associated with it a type identifier, which is a text string, and implements a series of functions that respond to different window events (resize, update, draw) and user events (keyDown, keyUp, mouseMove, etc)
Components included in bg2 engine are in the scene package, and the most used ones are the following:
-
Camera: implements camera-specific functions, which basically is its projection matrix and other utilities, like projection strategies. There always has to be at least one camera in a scene -
Drawable: implements an object that can be drawn in the scene. Internally it contains a list of elements that store the necessary information to draw an object with its materials -
EnvironmentComponent: stores information about the environment that’s used to process global illumination, reflections and other effects needed to implement the PBR pipeline. For example, in this component the skybox texture is saved -
LightComponent: stores information about a light. Depending on the rendering pipeline type, a scene can have certain light requirements. For example, the basic PBR IBL pipeline requires at least one light, and the total number of lights it supports is limited. In other pipelines, light requirements can change -
Transform: stores a transformation matrix. By default, a node is always at position (0, 0, 0), with components of typeTransformwe can move them to another position
A component can access the node that contains it through the read-only node property. If this property returns null it’s because the component wasn’t added to any node
1.3. Transform
Section titled “1.3. Transform”A Transform component modifies the position of a node and also of all its descendants. For example, if we have a node with a transformation that moves it to position 5, 0, 0, and this node has a child node at position 0, 5, 0, the child node’s final position will also accumulate the parent’s transformation. Therefore the final position will be 5, 5, 0
const sceneRoot = new Node("Scene Root");
const sceneElements = new Node("Scene Elements");sceneRoot.addChild(sceneElements);sceneElements.addComponent(new Transform(Mat4.MakeTranslation(5, 0, 0)));
const box = new Node("Box");sceneElements.addChild(box);box.addComponent(new Transform(Mat4.MakeTranslation(0, 5, 0)));
The problem is that to know which is a node’s position in the scene, it’s not enough to query its Transform component, we also have to query all ancestor nodes to know the accumulated final position. This can be done automatically like this:
const boxMatrix = Transform.GetWorldMatrix(box);console.log("Box position: " + boxMatrix.translation);2. Main light
Section titled “2. Main light”Lights in bg2 engine are formed by two parts:
-
base.Lightobject: Stores light properties -
scene.LightComponentcomponent: This component stores aLightobject, therefore it’s the junction point of a light with the scene
Lights are always at position (0, 0, 0), and furthermore, lights that have direction always point towards the negative Z axis (towards inside the screen). The light’s final position and direction will be determined by the scene node containing the LightComponent component’s global transformation:
const lightComp = lightNode.component("LightComponent");
// Accessing light properties through the `light` accessorlightComp.light.color = new Color(1, 0, 0, 1);

// Calculating the light's position:const lightWorldPos = Transform.GetWorldMatrix(lightNode).translation;
2.1. base.Light object
Section titled “2.1. base.Light object”Stores properties of a basic bg2 engine light. A basic light can be of three types:
-
Directional (
LightType.DIRECTIONAL): is a light that has a single direction, doesn’t have position and also doesn’t have attenuation. It would be equivalent to sunlight. Directional lights have the capability of casting shadows -
Spot (
LightType.SPOT): is a light with position, direction and attenuation. In addition to this, it has a spot angle that indicates how open or closed the light’s beam is -
Point (
LightType. POINT): is a light that has point position, has attenuation, and is omnidirectional (shines in all directions from its position)
Light properties store the light configuration for any of the four types, therefore depending on the type, a light will only be affected by properties that make sense for its type. For example, a directional light will ignore the position property:
-
enabled(read/write): indicates whether the light is enabled or not -
type(read/write): indicates the light type:
import Light, { LightType } from "bg2e-js/ts/base/Light.ts"...myLight.type = LightType.SPOT;-
direction(read/write): indicates the light’s direction. It’s possible to modify the direction manually with this property, which by default is(0, 0, -1), but it will be affected by the accumulated transformation matrix of the node containing theLightcomponent, therefore it’s not recommended to use this property to indicate the light’s direction -
position(read/write): indicates the light’s position. In the same way as happens withdirection, it’s affected by the node’s transformation matrix, so it’s better not to modify that property
To obtain a light’s position and orientation in the scene, we need to take into account both the position and direction properties as well as the node’s transformation matrix:
const lightMatrix = Transform.GetWorldMatrix(lightNode);const lightComp = lightNode.component("LightComponent")!;const light = lightComp.light;const lightPos = Mat4.Mult(lightMatrix, light.position);const lightDir = Mat4.Mult(lightMatrix, light.direction);-
color(read/write): indicates the light’s color. The color’s alpha component isn’t used. It’s possible to assign the color value with abase.Colorobject or with a normal array -
intensity(read/write): indicates the light’s intensity. This value will be used by the shader to calculate the final color -
spotCutoff(read/write): spot’s cutoff angle. This value allows us to modify how much the spot light angle opens: the greater the angle, the greater the area the spot will illuminate -
spotExponent(read/write): this value affects how sharp or diffuse the light’s spot area edge appears -
shadowStrength(read/write): is a value between 0 and 1 that indicates the shadow’s intensity, in lights that cast shadows -
castShadows(read/write): enables shadow casting in compatible lights -
shadowBias(read/write): this value affects the shadow’s calculation. A very large value can make the cast shadows separate too much from the surface, while a too small value can cause artifacts in surfaces that shouldn’t have shadows. The optimal value will depend a lot on the scene’s characteristics, camera zoom, etc, but mainly a scene with small objects will require a smaller shadowBias. Typical values are usually between0.00002and0.005
Note: try to avoid shadowBias values ending in 1, for example, 0.0001. Due to the floating point number representation system, these values tend to give more problems
projection/depthTexture/viewMatrix: these properties are used to calculate lighting in compatible lights. Generally you shouldn’t touch these properties, since they’re meant to be modified by the concrete renderer that’s drawing the scene
Shadows-compatible lights depend on the renderer being used. The default renderer for WebGL supports shadows in directional lights
2.2. scene.LightComponent object
Section titled “2.2. scene.LightComponent object”It’s the component that contains the light and connects it with the scene. Since this component simply acts as a connection between the light and the scene, it only has one relevant property:
light(read/write): reference to thebase.Lightobject that stores the light properties
In addition to this, the LightComponent component implements a series of static functions that can be used to query lights from the scene:
-
LightComponent.GetLights(sceneRoot: Node) : LightComponent[]: Returns all lights contained by the scene -
LightComponent.GetFirstShadowCastingLight(sceneRoot: Node) : LightComponent | undefined: Returns the first light in the lights list that’s compatible with shadow casting -
LightComponent.GetMainDirectionalLight(sceneRoot: Node) : LightComponent | undefined: Returns the scene’s main directional light
3. Camera
Section titled “3. Camera”We’ve already seen quite a bit about cameras in the previous chapter. In this chapter we’re going to add a camera to a scene from scratch, while in the previous chapter what we did was modify an existing camera in a scene. You’ll see that essentially you already know almost everything needed
In this case, to build a camera from scratch, we need a node added to the scene that contains a Camera component and a Transform component. Additionally, if we want to control the camera with user input, we’ll also need a camera controller component
Otherwise, the camera configuration is identical to what we saw in the example of the previous chapter:
import Camera, { OpticalProjectionStrategy } from "bg2e-js/ts/scene/Camera.ts";import SmoothOrbitCameraController from "bg2e-js/ts/scene/SmoothOrbitCameraController.ts";
...
async loadScene() {  ...  const cameraNode = new Node("Camera");  const camera = new Camera();  camera.projectionStrategy = new OpticalProjectionStrategy();  cameraNode.addComponent(camera);  cameraNode.addComponent(new Transform());  cameraNode.addComponent(new SmoothOrbitCameraController());  sceneRoot.addChild(cameraNode);  ...}
4. Drawable objects
Section titled “4. Drawable objects”The Drawable component serves to add drawable objects to the scene. A Drawable component contains a list of elements that are necessary to draw an object in the scene. Each element contains a PolyList, a Material, and a transformation matrix that allows modifying that element’s position in the list
4.1. PolyList
Section titled “4.1. PolyList”The base.PolyList object stores 3D mesh data. It can be understood as a submesh of a 3D model: possibly in the 3D editor this element is part of a larger mesh, but bg2 engine separates these meshes into independent elements to facilitate certain operations. When a 3D model is imported in the native bg2 engine format (.bg2 files), the model’s elements are separated into polyLists, regardless of whether each one of those elements formed part of a submesh or whether they were completely independent meshes. The final goal is to be able to treat all list elements the same way
PolyList objects are formed by vertices, and each vertex consists of:
-
A position in space
-
A normal coordinate
-
A minimum of one texture coordinate, and a maximum of three (although currently shaders only support a maximum of two)
-
A tangent coordinate
If the object doesn’t have tangent coordinates, they will be attempted to be generated from normal coordinates and texture coordinates, but it’s possible the final result presents artifacts in lighting
If the object has a single set of texture coordinates, it will be used as the second set: at the end all bg2 engine 3D models have two sets of texture coordinates, even if they’re identical. This facilitates material processing, since material properties that have texture allow specifying which texture coordinate set we want to use for that property
4.2. Materials
Section titled “4.2. Materials”Materials are stored in objects of type base.Material. Contrary to what happens in most 3D engines, materials in bg2 engine aren’t designed to be reused across multiple PolyLists. This is because in bg2 engine we have very few material types (there’s actually only one material type, although in the future more types could be added). Therefore, material properties occupy very little memory, and having a single material type gives us the advantage that the same shader can process all objects’ materials, simply by passing their properties
Thanks to this system, we can modify any object’s material without worrying that this might have effects on other scene elements
Material properties are divided into several groups:
-
Albedo
-
albedo(read/write): material color -
alphaCutoff(read/write): indicates the alpha value for which the fragment will be discarded by the fragment shader. This can be used to represent objects with very complex geometry that blend opaque and transparent areas, for example a grid. By default it’s 0.5 -
albedoTexture(read/write): texture for the material color, which will be multiplied by thealbedovalue to obtain the final color -
albedoScale(read/write): scale to be applied to the texture coordinate for sampling it -
albedoUV(read/write): texture coordinate set to be used for samplingalbedoTexture. By default it’s 0 -
isTransparent(read/write): transparent and opaque objects are processed in different layers. If the value ofalbedois less than 1, then the graphics engine already knows that the object is transparent and will be processed as such. But if the transparency is determined byalbedoTexturethe engine doesn’t have a way to know if the object is transparent or not. This property serves to force an object to be processed in the transparent objects layer
-
-
Normal Map
-
normalTexture(read/write): normal map texture -
normalScale(read/write): scale to be applied to the texture coordinate for sampling it -
normalUV(read/write): texture coordinate set to be used for samplingnormalTexture. By default it’s 0
-
-
Metalness
-
metalness(read/write): material’s metalness, as a value between 0 and 1. Although in the PBR pipeline a material is dielectric (0) or metallic (1), using intermediate values we can create composite material effects that at sub-surface scale may be composed of blends of dielectric and metallic materials -
metalnessTexture(read/write): texture whose sampled value for the surface pixel will be multiplied bymetalnessto obtain the final metalness value -
metalnessScale(read/write): vector that will be multiplied by the texture coordinate for scaling it -
metalnessChannel(read/write): since metalness is a numeric value, themetalnessTexturetexture is used monochromatically. This property indicates which texture channel (R, G, B, A) we want to use -
metalnessUV(read/write): texture coordinate set to be used for samplingmetalnessTexture. By default it’s 0
-
-
Roughness
-
roughness(read/write): material’s roughness, as a value between 0 and 1 -
roughnessTexture(read/write): roughness texture. The final roughness value will be theroughnessvalue multiplied by theroughnessTexturevalue sampled for that pixel -
roughnessChannel(read/write): since the roughness value is monochromatic, this property indicates which texture channel we want to use (R, G, B, A) -
roughnessScale(read/write): is a vector that multiplies by the texture coordinate for scaling it -
roughnessUV(read/write): indicates which UV set we’re going to use to sampleroughnessTexture. By default it’s 0
-
-
Fresnel/Sheen: These properties affect the material’s specular reflection color
-
fresnelTint(read/write): tint applied to the specular reflection part when the material is rough -
sheenIntensity(read/write): specular reflection intensity -
sheenColor(read/write): specular reflection color
-
-
Light Emission
-
lightEmissionTexture(read/write): Light emission texture -
lightEmission(read/write): Light emission color. The final color will be the value sampled for that pixel oflightEmissionTexturemultiplied bylightEmission -
lightEmissionChannel(read/write): The light emission texture is monochromatic, this property indicates the texture channel we’ll use for this purpose (R, G, B, A) -
lightEmissionScale(read/write): scale applied to the texture coordinate -
lightEmissionUV(read/write): texture coordinate set to be used forlightEmissionTexture, by default it’s 0
-
-
Ambient Occlussion
-
ambientOcclussion(read/write): It’s a texture where we can assign the precalculated object illumination. Although it’s calledambientOcclussion, here we can save any precalculated illumination texture with any technique, but this texture is always processed monchromatically -
ambientOcclussionChannel(read/write): channel of the image we’re going to use as ambient occlussion -
ambientOcclussionUV(read/write): texture coordinate set we’ll use for the ambient occlussion. By default, unlike the rest of properties, the channel 1 is used
-
-
Flags
-
castShadows(read/write): indicates whether the object should cast shadows when illuminated by a cast-shadow light. By default it’s true -
unlit(read/write): indicates whether we want the object not to process illumination information at all. In this case, the shader will simply return thealbedovalue multiplied by thealbedoTexturevalue sampled
-
When creating textures for a material, notice that the properties metalnessTexture, roughnessTexture, lightEmissionTexture and ambientOcclussion are all monochromatic. You can use this to encode each of these components in a single texture file to save disk space. However, this won’t have any effect on performance. Internally, bg2 engine will take each of these four textures and combine them into a single image, regardless of whether you indicated four different images or a single image for the four. When the final image is composed for these components, the engine will discard the source textures and won’t load them into the graphics card
Note: not all renderers process material properties equally, and in some cases the properties might not be compatible. For example, a blinn/phong renderer won’t use the metalness nor roughness properties
4.3. Working with Drawable
Section titled “4.3. Working with Drawable”Until now we’ve seen some code examples. At this point we already know enough to start writing code in our example, so let’s start building a basic scene with what we’ve seen so far
Let’s modify the loadScene() function, but you’ll also have to add some imports in the file header:
import Node from "bg2e-js/ts/scene/Node.ts"import Transform from "bg2e-js/ts/scene/Transform.ts"import Drawable from "bg2e-js/ts/scene/Drawable.js";import Mat4 from "bg2e-js/ts/math/Mat4.ts";import Vec from "bg2e-js/ts/math/Vec.ts";import { createSphere, createPlane } from "bg2e-js/ts/primitives/index.ts";import Material from "bg2e-js/ts/base/Material.ts";import Color from "bg2e-js/ts/base/Color.js";import Light from "bg2e-js/ts/base/Light.js";import LightComponent from "bg2e-js/ts/scene/LightComponent.js";import Texture from "bg2e-js/ts/base/Texture.js";
async loadScene() {  const sceneRoot = new Node("Scene Root");
  const sceneElements = new Node("Scene Elements");  sceneRoot.addChild(sceneElements);
  const sphere = new Node("Sphere");  sceneElements.addChild(sphere);  sphere.addComponent(new Transform(Mat4.MakeTranslation(0, 0.5, 0)));
  const spherePlist = createSphere(0.5);  const sphereDrawable = new Drawable();  const material = new Material();  sphereDrawable.addPolyList(spherePlist, material, Mat4.MakeIdentity());  sphere.addComponent(sphereDrawable);
  const floorNode = new Node("Floor");  floorNode.addComponent(new Transform(Mat4.MakeTranslation(0, -0.5, 0)));  const floorPlist = createPlane(10, 10);  const floorDrawable = new Drawable();  floorDrawable.addPolyList(floorPlist, new Material(), Mat4.MakeIdentity());  floorNode.addComponent(floorDrawable);  sceneElements.addChild(floorNode);
  this.updateOnInputEvents = true;  this.updateInputEventsFrameCount = 120;  return sceneRoot;}
Now let’s add a light and a camera. After the line box.addComponent(boxDrawable) add this code:
const cameraNode = new Node("Camera");const camera = new Camera();camera.projectionStrategy = new OpticalProjectionStrategy();cameraNode.addComponent(camera);cameraNode.addComponent(new Transform());cameraNode.addComponent(new SmoothOrbitCameraController());sceneRoot.addChild(cameraNode);

const lightNode = new Node("Light");const light = new Light();lightNode.addComponent(new LightComponent(light));lightNode.addComponent(new Transform(  Mat4.MakeRotation(0.62, -0.5, 0.5, 0)));sceneRoot.addChild(lightNode);
This is our first scene created from scratch

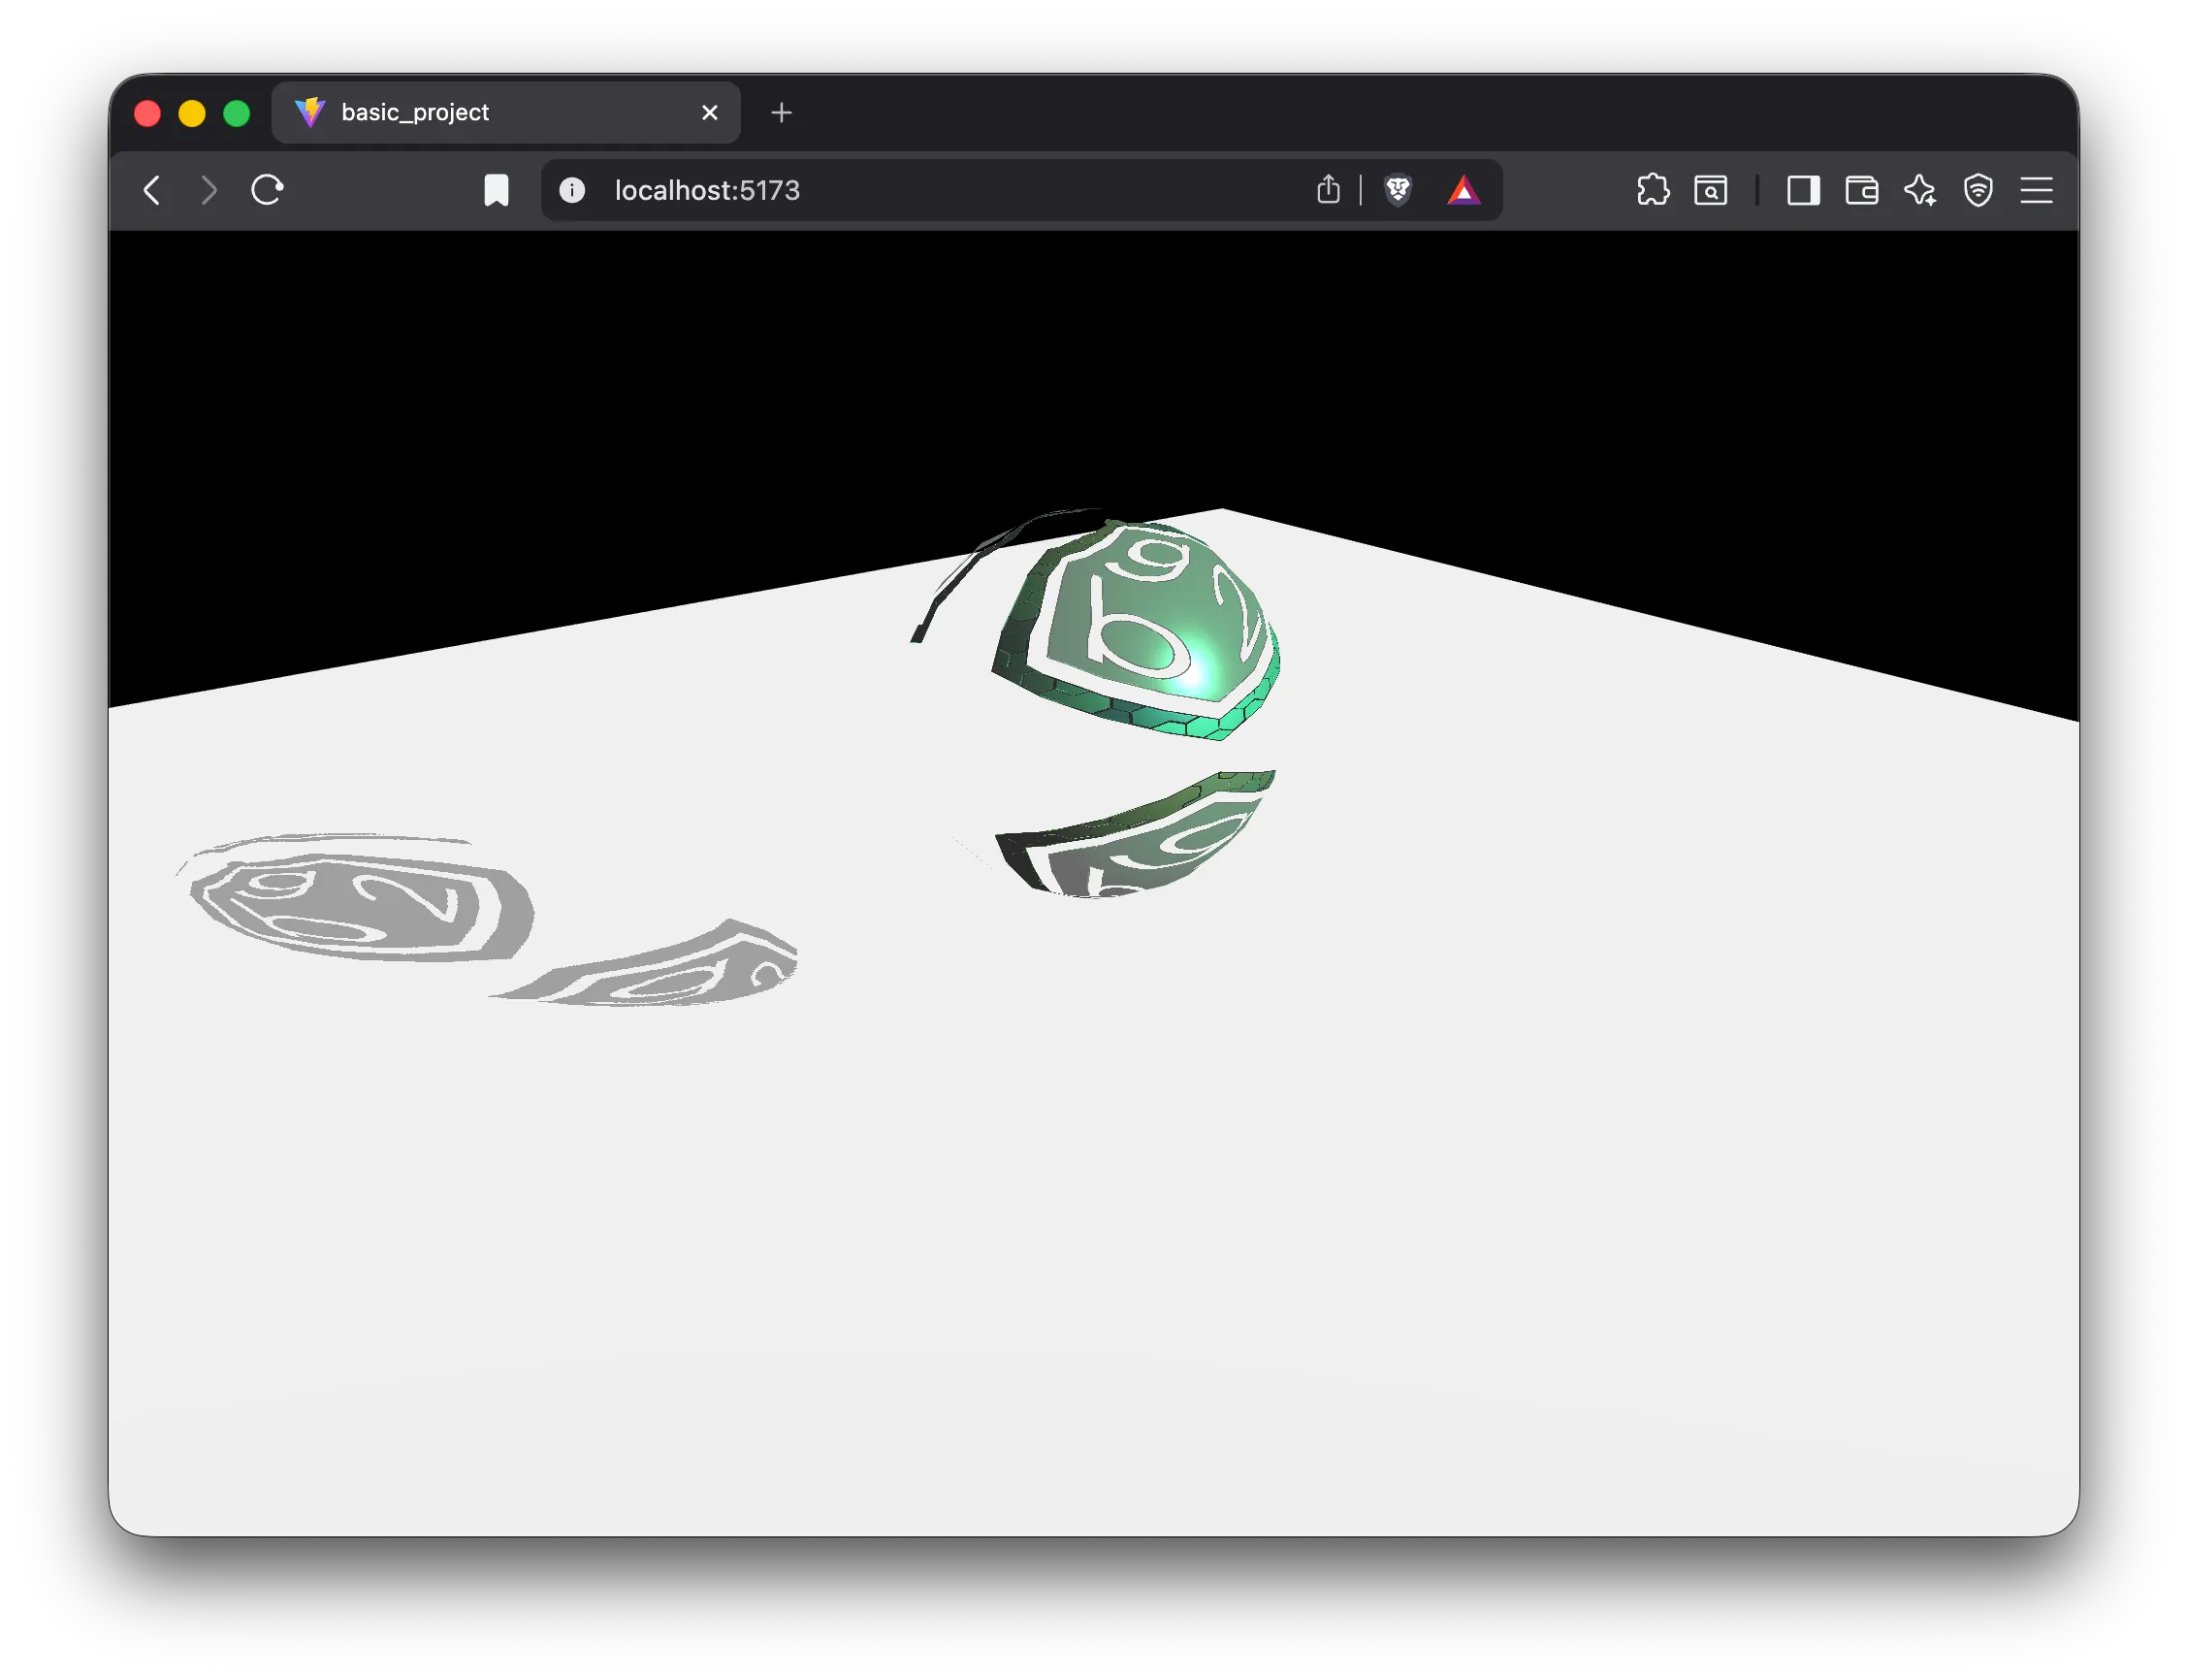
Let’s modify the sphere’s material. Material properties can be either a texture, or any other numeric, vector or color type. If the property is a texture, we first have to load the texture, while if it’s any other type it can be assigned directly to the material
Let’s change the sphere’s material to use a texture and other values of other types:
const material = new Material();material.albedo = new Color([0.1, 0.9, 0.2, 1]);material.albedoScale = new Vec(2, 2);const albedoTexture = new Texture();albedoTexture.fileName = "/logo_transparent.png";await albedoTexture.loadImageData();material.albedoTexture = albedoTexture;
If we want to load more than one texture, we can speed up the process by loading in parallel. For this, we can use the loadImageData() function as promises, add them to a vector, and wait for all at once:
const material = new Material();material.albedo = new Color([0.1, 0.9, 0.2, 1]);const scale = new Vec(2, 2);material.albedoScale = scale;material.normalScale = scale;material.metalnessScale = scale;material.roughnessScale = scale;const albedoTexture = new Texture();albedoTexture.fileName = "/logo_transparent.png";const normalTexture = new Texture();normalTexture.fileName = "/logo_nm.png";const metalnessRoughnessTexture = new Texture();metalnessRoughnessTexture.fileName = "/logo_hm.png";await Promise.allSettled([ albedoTexture.loadImageData(), normalTexture.loadImageData(), metalnessRoughnessTexture.loadImageData()]);material.albedoTexture = albedoTexture;material.normalTexture = normalTexture;material.metalness = 1;material.metalnessTexture = metalnessRoughnessTexture;material.roughnessTexture = metalnessRoughnessTexture;Note: notice how in the previous code we put the
metalnesscomponent at 1. The default value ofmetalnessis 0. Since this value is multiplied bymetalnessTexture, if we want to use a texture for metalness, we’ll always need to modifymetalnessto a value greater than zero, otherwise the operation’s result will always be zero, andmetalnessTexturewon’t have any effect
5. Environment
Section titled “5. Environment”In the previous scene the lighting looks extremely harsh. This is because in a realistic PBR pipeline a background is necessary. The environment in PBR is used for:
-
Ambient lighting calculation: since there’s no environment, the ambient light is completely black, that’s why everything that isn’t directly illuminated will appear in gray tones
-
Reflection generation: objects with low roughness, besides responding to light with a specular shine, also reflect the environment
Depending on the PBR pipeline type, the environment might be also used for other things besides these. And regardless of all this, the environment can also be used to render the skybox
To configure the environment, we need an equirectangular image. In this case we have the mirrored_hall_4k.png file that we copied at the beginning when preparing the project. Now we’re going to use it to create our environment. Add this code in your loadScene() function, just before this.updateOnInputEvents = true:
const env = new EnvironmentComponent();env.equirectangularTexture = '/mirrored_hall_4k.png';env.showSkybox = true;sceneRoot.addComponent(env);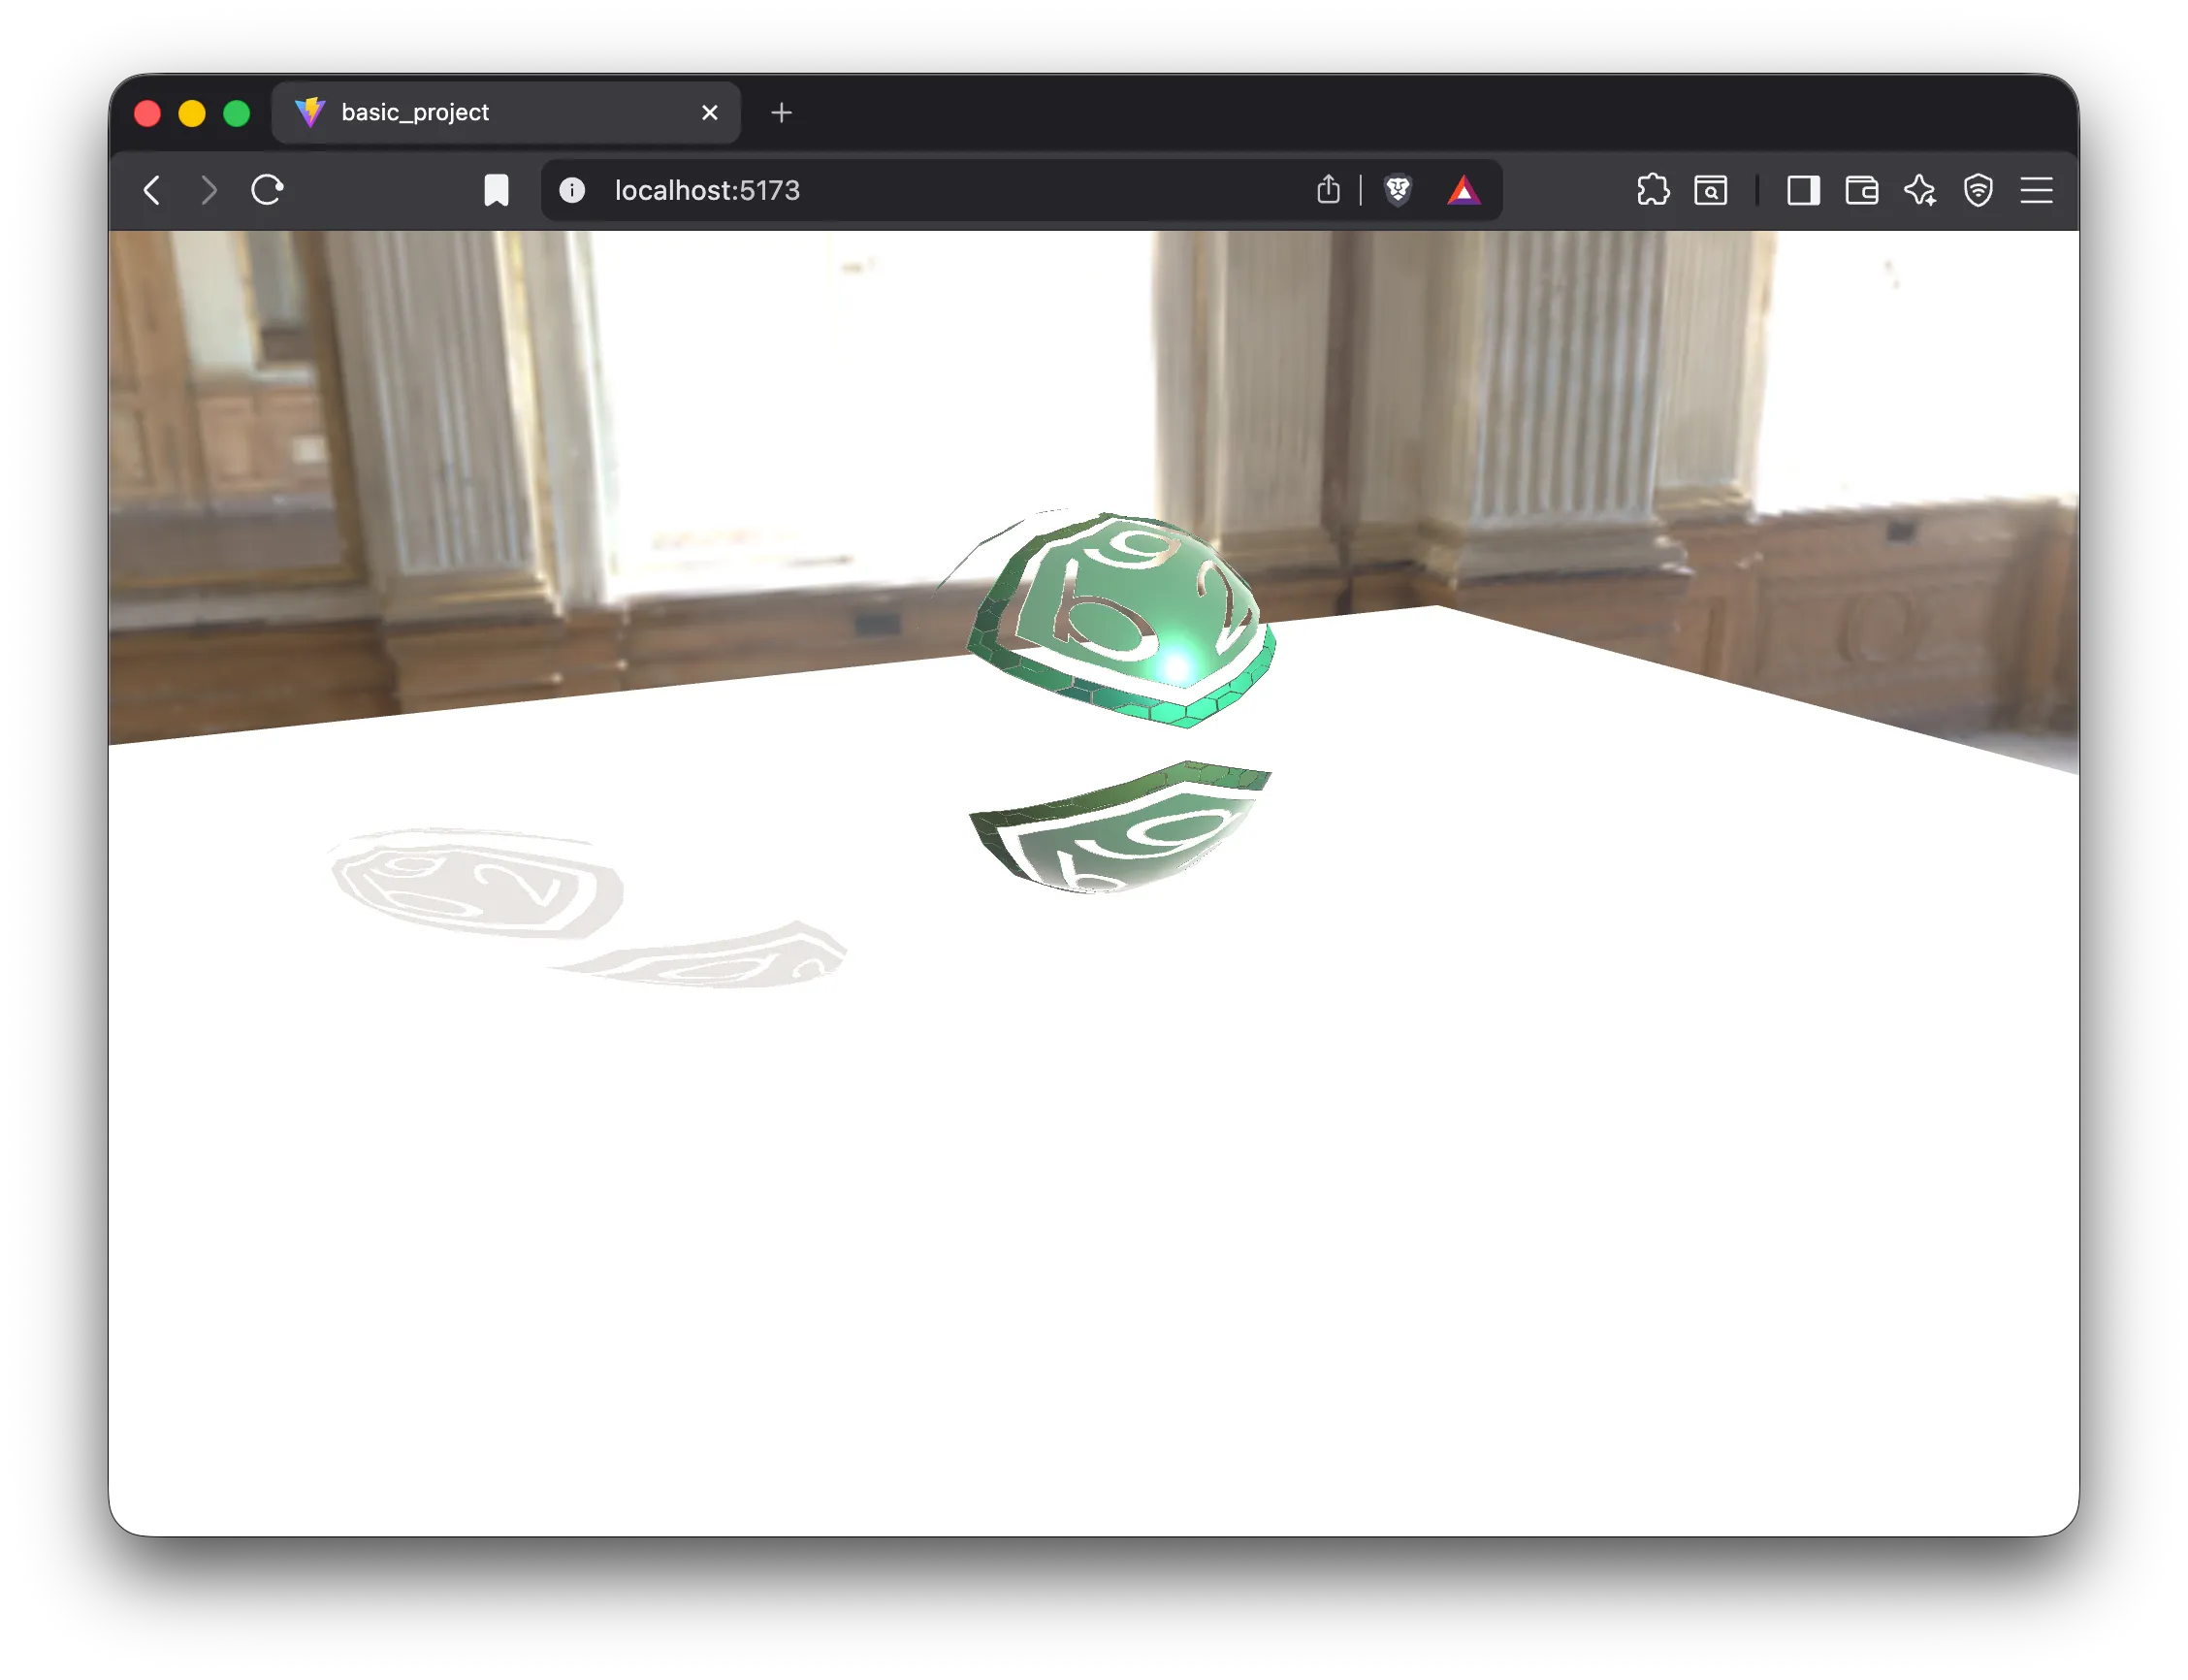
We added the environment in the root node, but actually it can be added to any node. When only there’s one environment in the scene, it doesn’t matter which node we add it to, nor its position
6. Complex scenes
Section titled “6. Complex scenes”Generally, creating a static scene like the one we created before doesn’t make much sense: it’s much easier to use the scene creation tool and load the file. Creating scenes by code makes more sense when it’s wanted to be done procedurally. Let’s create a procedural scene, and along the way we’ll see some more utilities for material creation
First, let’s move the sphere we added in the previous step up a bit, so we’ll leave more space below to create more elements:
// Modifying the translation to move the sphere a bit upsphere.addComponent(new Transform(Mat4.MakeTranslation(0, 1.0, 0)));Since we’re going to add many spheres, we’re going to create a helper function that we’ll call many times. This way we’ll be able to create a sphere with its material using a single line. Additionally, we’ll also create a variable in the class to store the sphere’s poly list. The idea is to reuse the same poly list for all the Drawable objects we add. If two objects’ geometry is going to be the same, then there’s no reason to load it multiple times. However, we’ll create the material independent for each sphere, because we’re going to specify different properties for each sphere
class MyAppController extends SceneAppController {  private _spherePlist: PolyList | null = null;
  private async createSphereNode({    name,    roughness,    metalness,    albedo = new Color([0.85, 0, 0, 1]),    albedoTexture,    normalTexture,    position = [0, 0, 0]  } : {    name: string,    roughness: number,    metalness: number,    albedo?: Color,    albedoTexture?: string,    normalTexture?: string,    position: number[]  }) : Promise<Node> {    const sphereNode = new Node(name);    this._spherePlist = this._spherePlist || createSphere(0.2);    sphereNode.addComponent(new Drawable())    sphereNode.drawable?.addPolyList(this._spherePlist, await Material.Deserialize({      albedo, roughness, metalness, albedoTexture, normalTexture    }), Mat4.MakeIdentity() );    sphereNode.addComponent(new Transform(Mat4.MakeTranslation(position[0], position[1], position[2])));    return sphereNode;  }}
Notice how we use the Material.Deserialize() function to create a material from some properties. This static async function allows loading a material from an object with property names, but additionally it’s capable of loading textures directly from their URL or relative path
Now we’re going to create a grid with spheres using two nested for loops. Add this code in the loadScene() function, between the section where we create the sphere and the section where we create the floor:
async loadScene() {  ...  sphere.addComponent(sphereDrawable);
  // Creating spheres procedurally  const rows = 10;  const cols = 10;  const separation = 0.75;  for (let i = 0; i < rows; i++) {    for (let j = 0; j < cols; j++) {      const roughness = i / (rows - 1);      const metalness = j / (cols - 1);      sceneElements.addChild(await this.createSphereNode({        name: `Sphere_${i}_${j}`,        roughness,        metalness,        position: [(j - (cols - 1) / 2) * separation, 0.15, (i - (rows - 1) / 2) * separation],        albedoTexture: "/vintage-tile1_albedo.jpeg",        normalTexture: "/vintage-tile1_normal.jpeg"      }));    }  }
  const floorNode = new Node("Floor");  ...}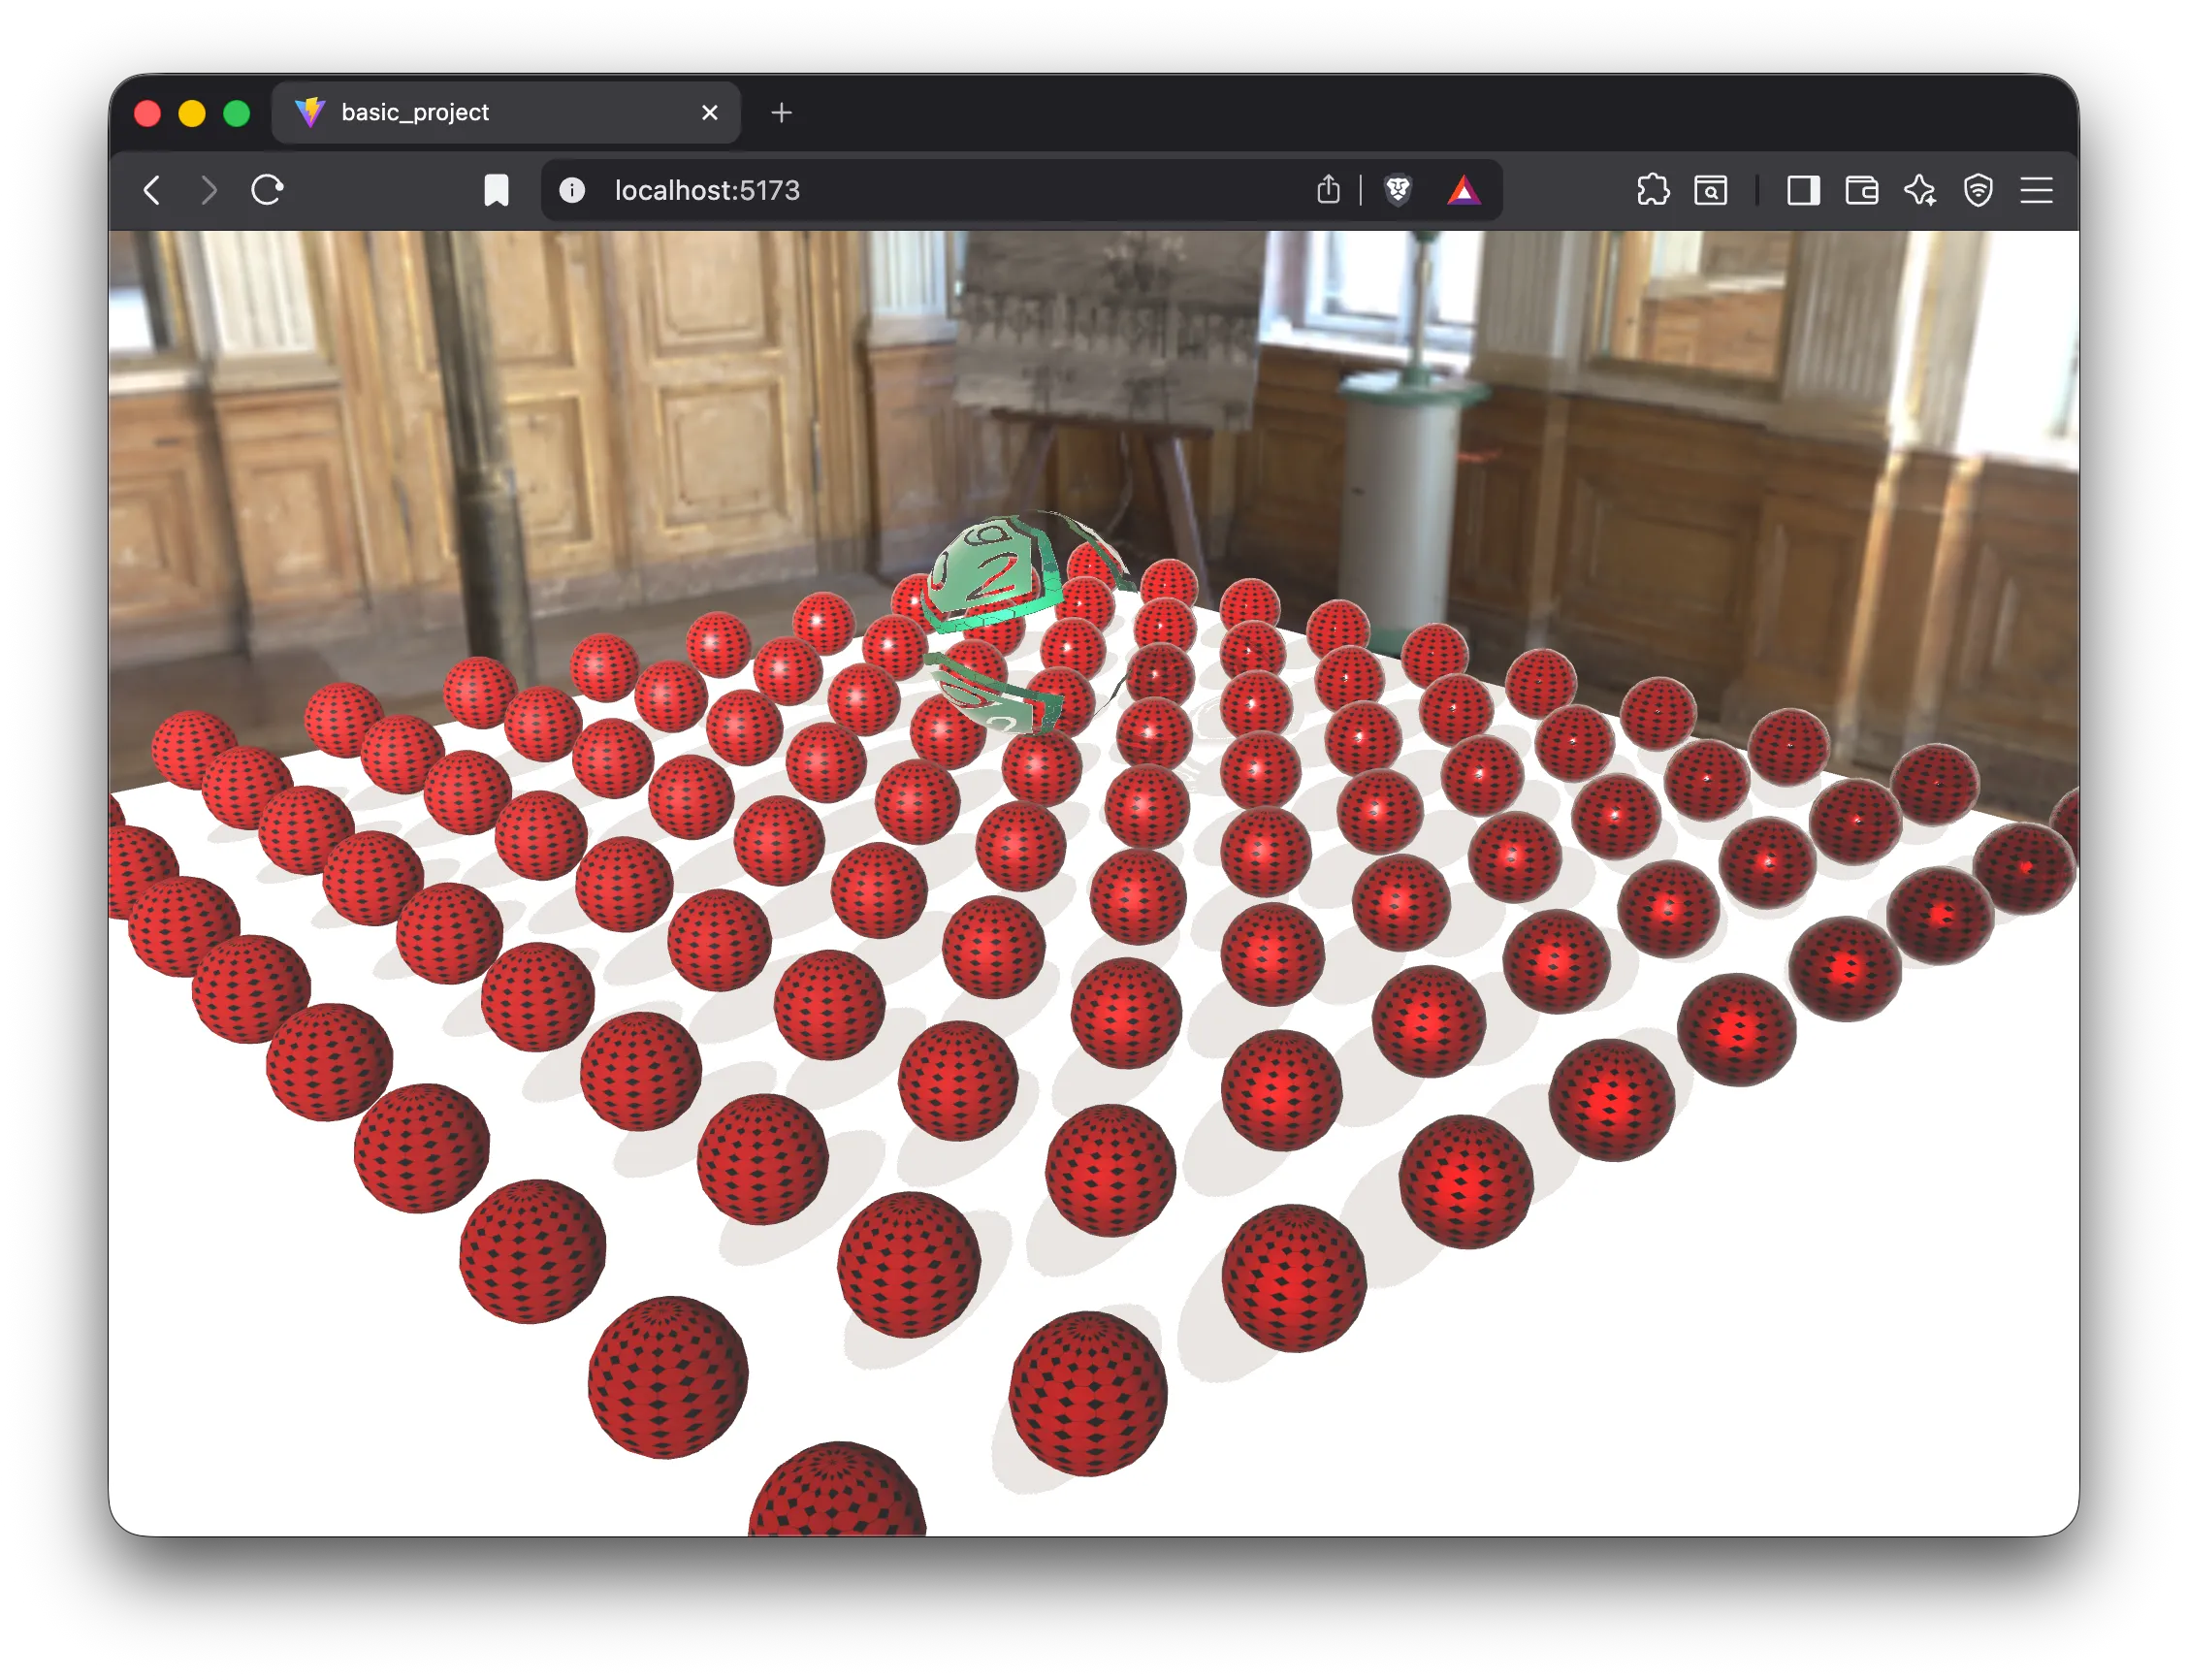
Note about selection: if you click on one of the spheres you’ll see that all are selected. This is because selection works at the PolyList level. Since all spheres are the same PolyList, it’s impossible to select them separately with this configuration. If we needed independent selection, then we would need to create a different PolyList for each sphere
7. Finding nodes in scenes: SceneVisitor
Section titled “7. Finding nodes in scenes: SceneVisitor”7.1. Visitor pattern
Section titled “7.1. Visitor pattern”The Visitor design pattern allows separation between data structure and its operations
Instead of adding methods to classes that compose a structure (for example, a scene tree) to perform different tasks such as printing information, validating data or exporting content, the Visitor pattern proposes encapsulating those operations in external objects called visitors
This way:
-
Structure objects (for example, scene nodes) remain focused on their main responsibility: storing and organizing data
-
Operations are implemented in independent classes (visitors)
-
It’s possible to add new operations without modifying existing classes of the structure
This is especially useful in hierarchical structures like a scene tree, where it’s common to want to traverse all nodes to perform different tasks
7.2. Applying the Visitor pattern in bg2 engine
Section titled “7.2. Applying the Visitor pattern in bg2 engine”In bg2 engine, the scene is organized as a node tree (Node). Each node can contain components and children nodes, forming a hierarchy
The Node class implements the method:
accept(nodeVisitor: NodeVisitor): voidThis method allows a visitor object to traverse the scene tree applying an operation on each node. Internally, traversal follows a depth-first (pre-order) scheme:
-
visit(this)is executed on the current node -
All children nodes are traversed recursively
-
didVisit(this)is executed at the end of traversing the current node’s subtree
In simplified form, the behavior is:
accept(nodeVisitor: any): void { if (!nodeVisitor.ignoreDisabled || this.enabled) { nodeVisitor.visit(this); this._children.forEach(ch => ch.accept(nodeVisitor)); nodeVisitor.didVisit(this); }}This provides two entry points to the visitor:
-
visit(node)→ called upon entering the node (pre-order) -
didVisit(node)→ called upon exiting the node (post-order)
This double callback allows implementing visitors that need to maintain hierarchical state, for example transformation stacks, depth counters, accumulators, etc
7.3. Filtering disabled nodes
Section titled “7.3. Filtering disabled nodes”The NodeVisitor class includes the property:
ignoreDisabled: boolean-
If
ignoreDisabled === true(default value), nodes withenabled = falsewon’t be visited, nor their children -
If
ignoreDisabled === false, all nodes will be traversed regardless of their state
7.4. Example: Visitor that prints node names
Section titled “7.4. Example: Visitor that prints node names”Next is shown an example of a visitor that traverses the scene and prints in console the name of each node, respecting the hierarchy through indentation:
import Node from "./Node";import NodeVisitor from "./NodeVisitor";
export default class PrintNodeNamesVisitor extends NodeVisitor {  private _depth = 0;
  override visit(node: Node) {    const indent = "  ".repeat(this._depth);    console.log(`${indent}${node.name}`);    this._depth++;  }
  override didVisit(node: Node) {    this._depth--;  }}
Visitor usage:
const visitor = new PrintNodeNamesVisitor();
// Optional: also visit disabled nodesvisitor.ignoreDisabled = false;
rootNode.accept(visitor);
If the scene contains a hierarchy like the following:
- Root
- Camera\
- Room
- Lamp
The console output will be:
Root Camera Room Lamp
This same mechanism can be used to implement any operation that requires traversing the scene tree without modifying the Node class
7.5. Finding nodes in the scene
Section titled “7.5. Finding nodes in the scene”bg2 engine includes several predefined scene visitors, and one of the most used is FindNodeVisitor: a visitor that allows locating nodes in a scene following different criteria
When creating the spheres, we named them with the pattern Sphere_X_Y, where X is the row index and Y is the column index. Knowing this, let’s locate the sphere with name Sphere_5_5 and let’s change its material color
Add this code at the end of the async loadScene() function, just before return:
const findVisitor = new FindNodeVisitor();findVisitor.name = "Sphere_5_5";
sceneRoot.accept(findVisitor);findVisitor.result?.forEach(node => {  const drw = node.component("Drawable")! as Drawable;  drw.items[0].material.albedo = new Color([0, 1, 0, 1]);});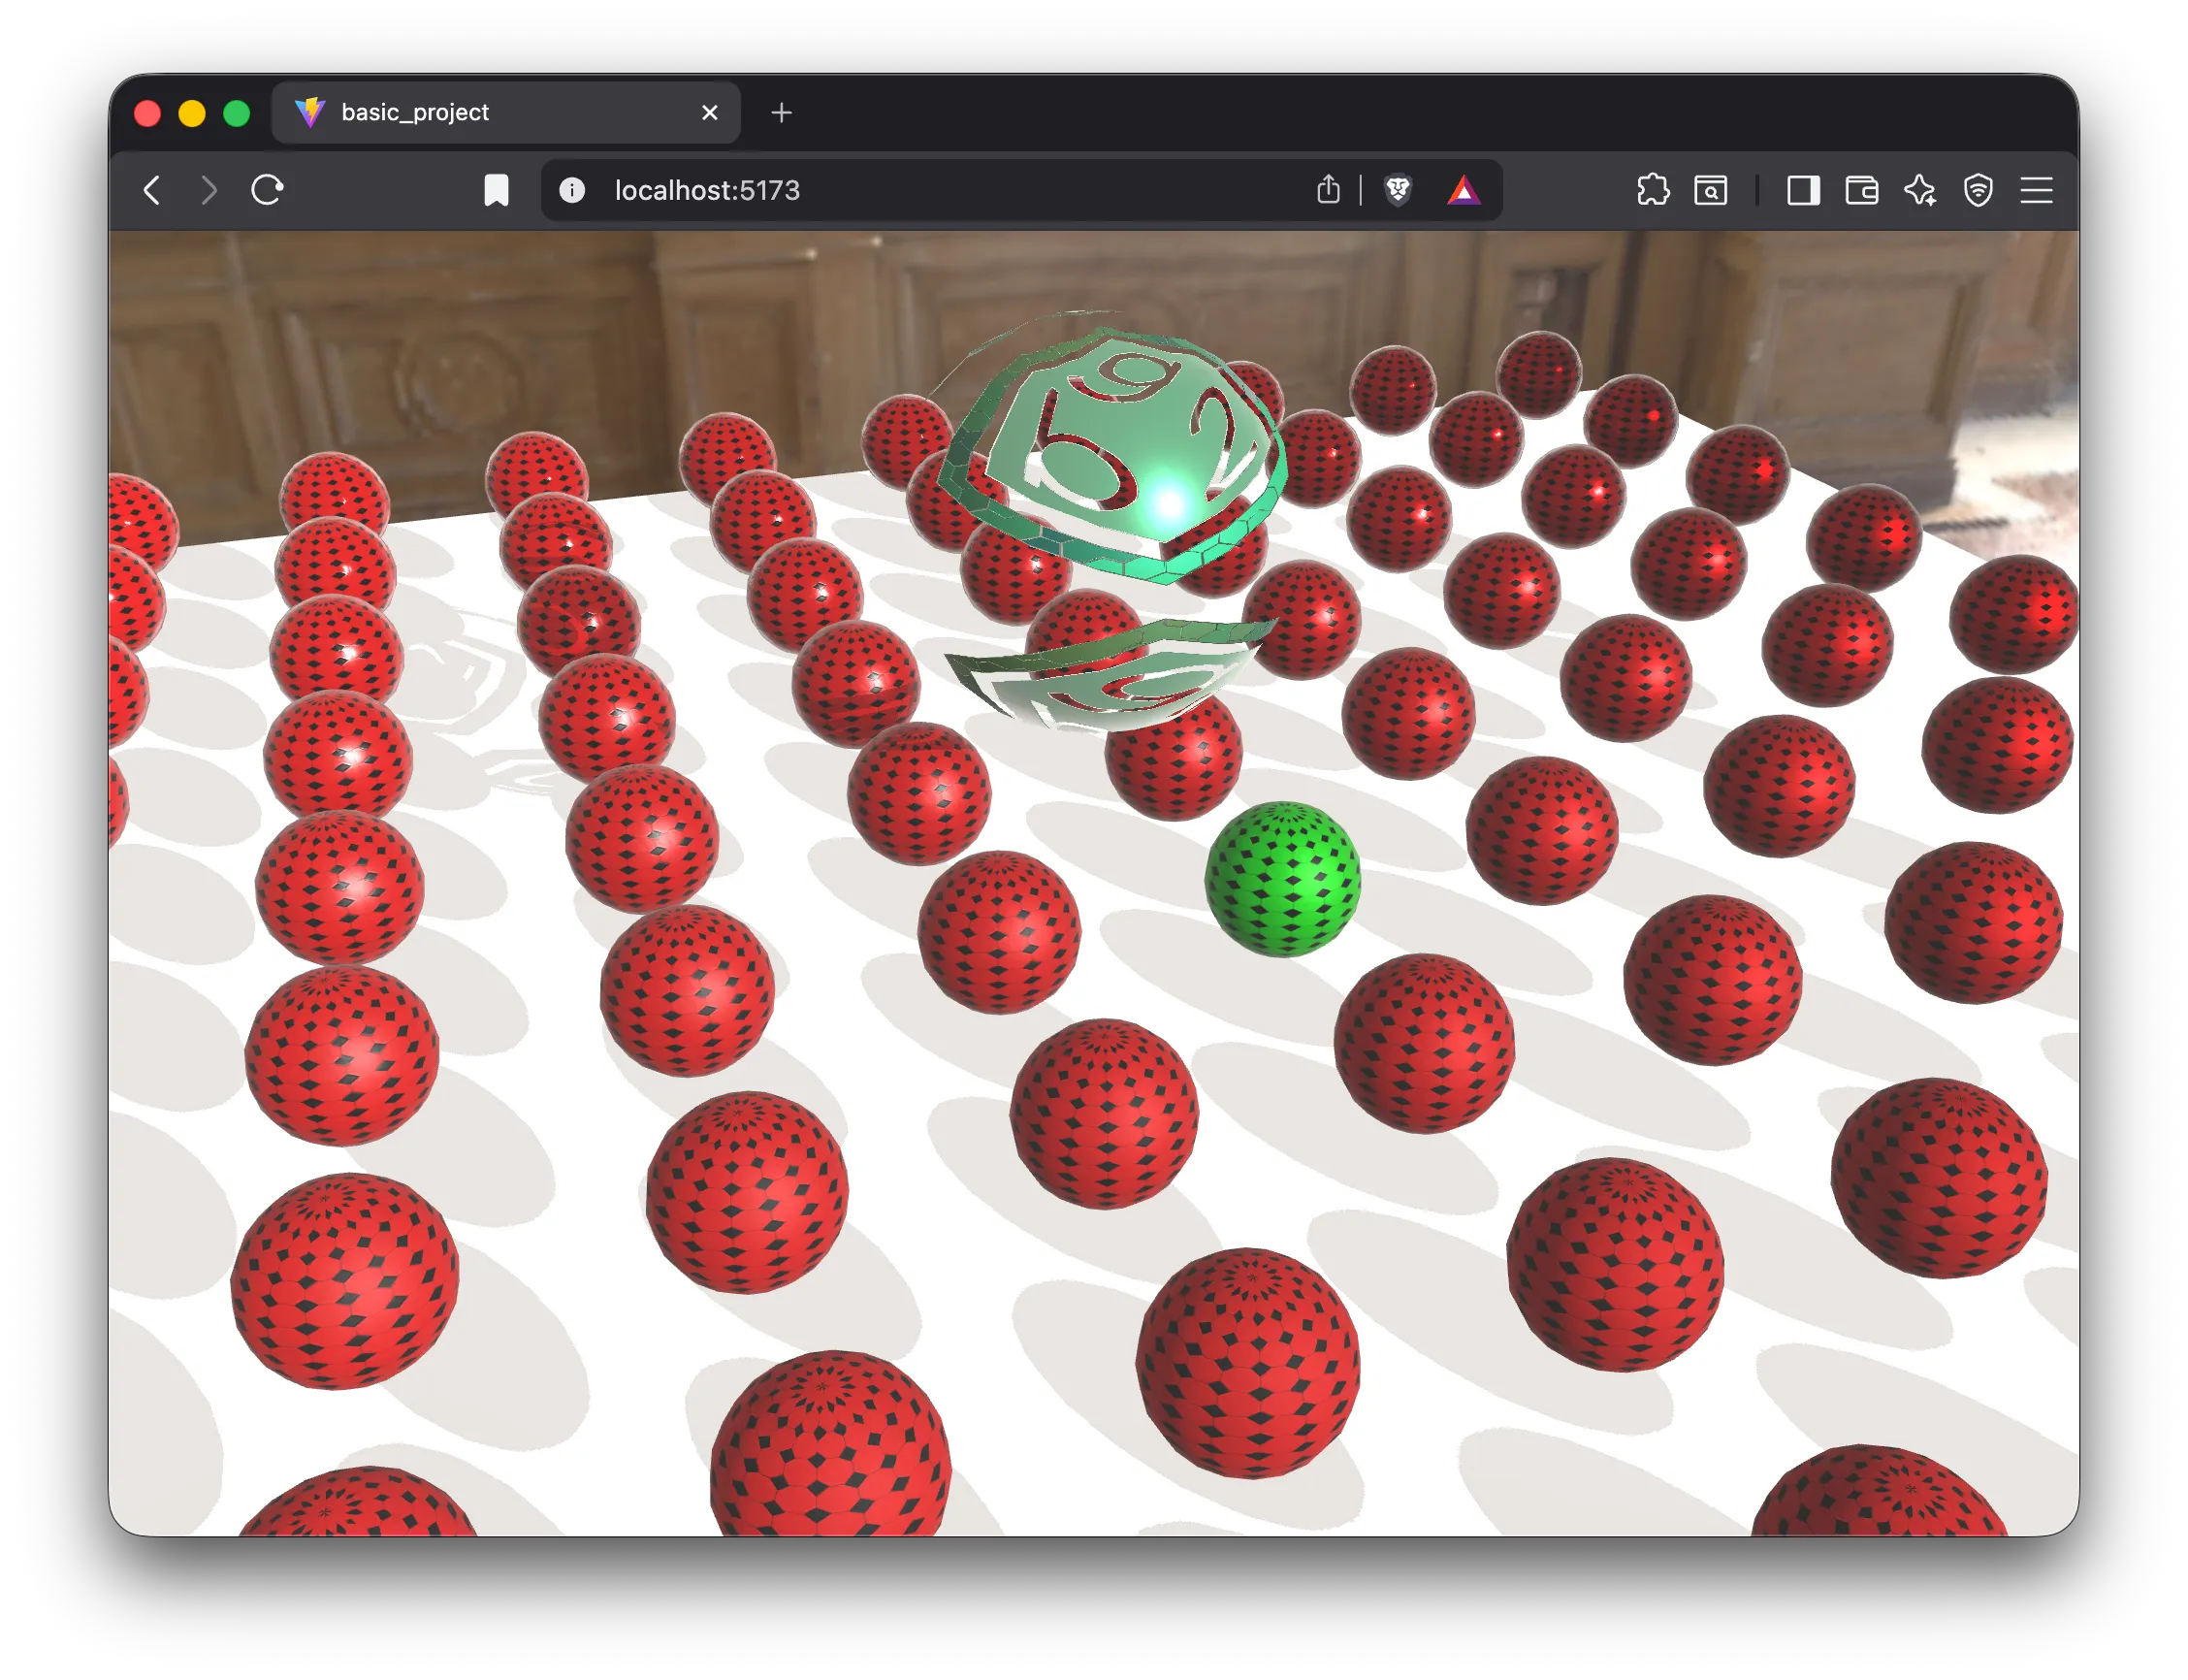
FindNodeVisitor includes many search filters. For example, instead of passing a node name, we can pass a regular expression. Modify the previous code to indicate a regular expression that returns all nodes of row 5:
findVisitor.name = /^Sphere\_5\_?/;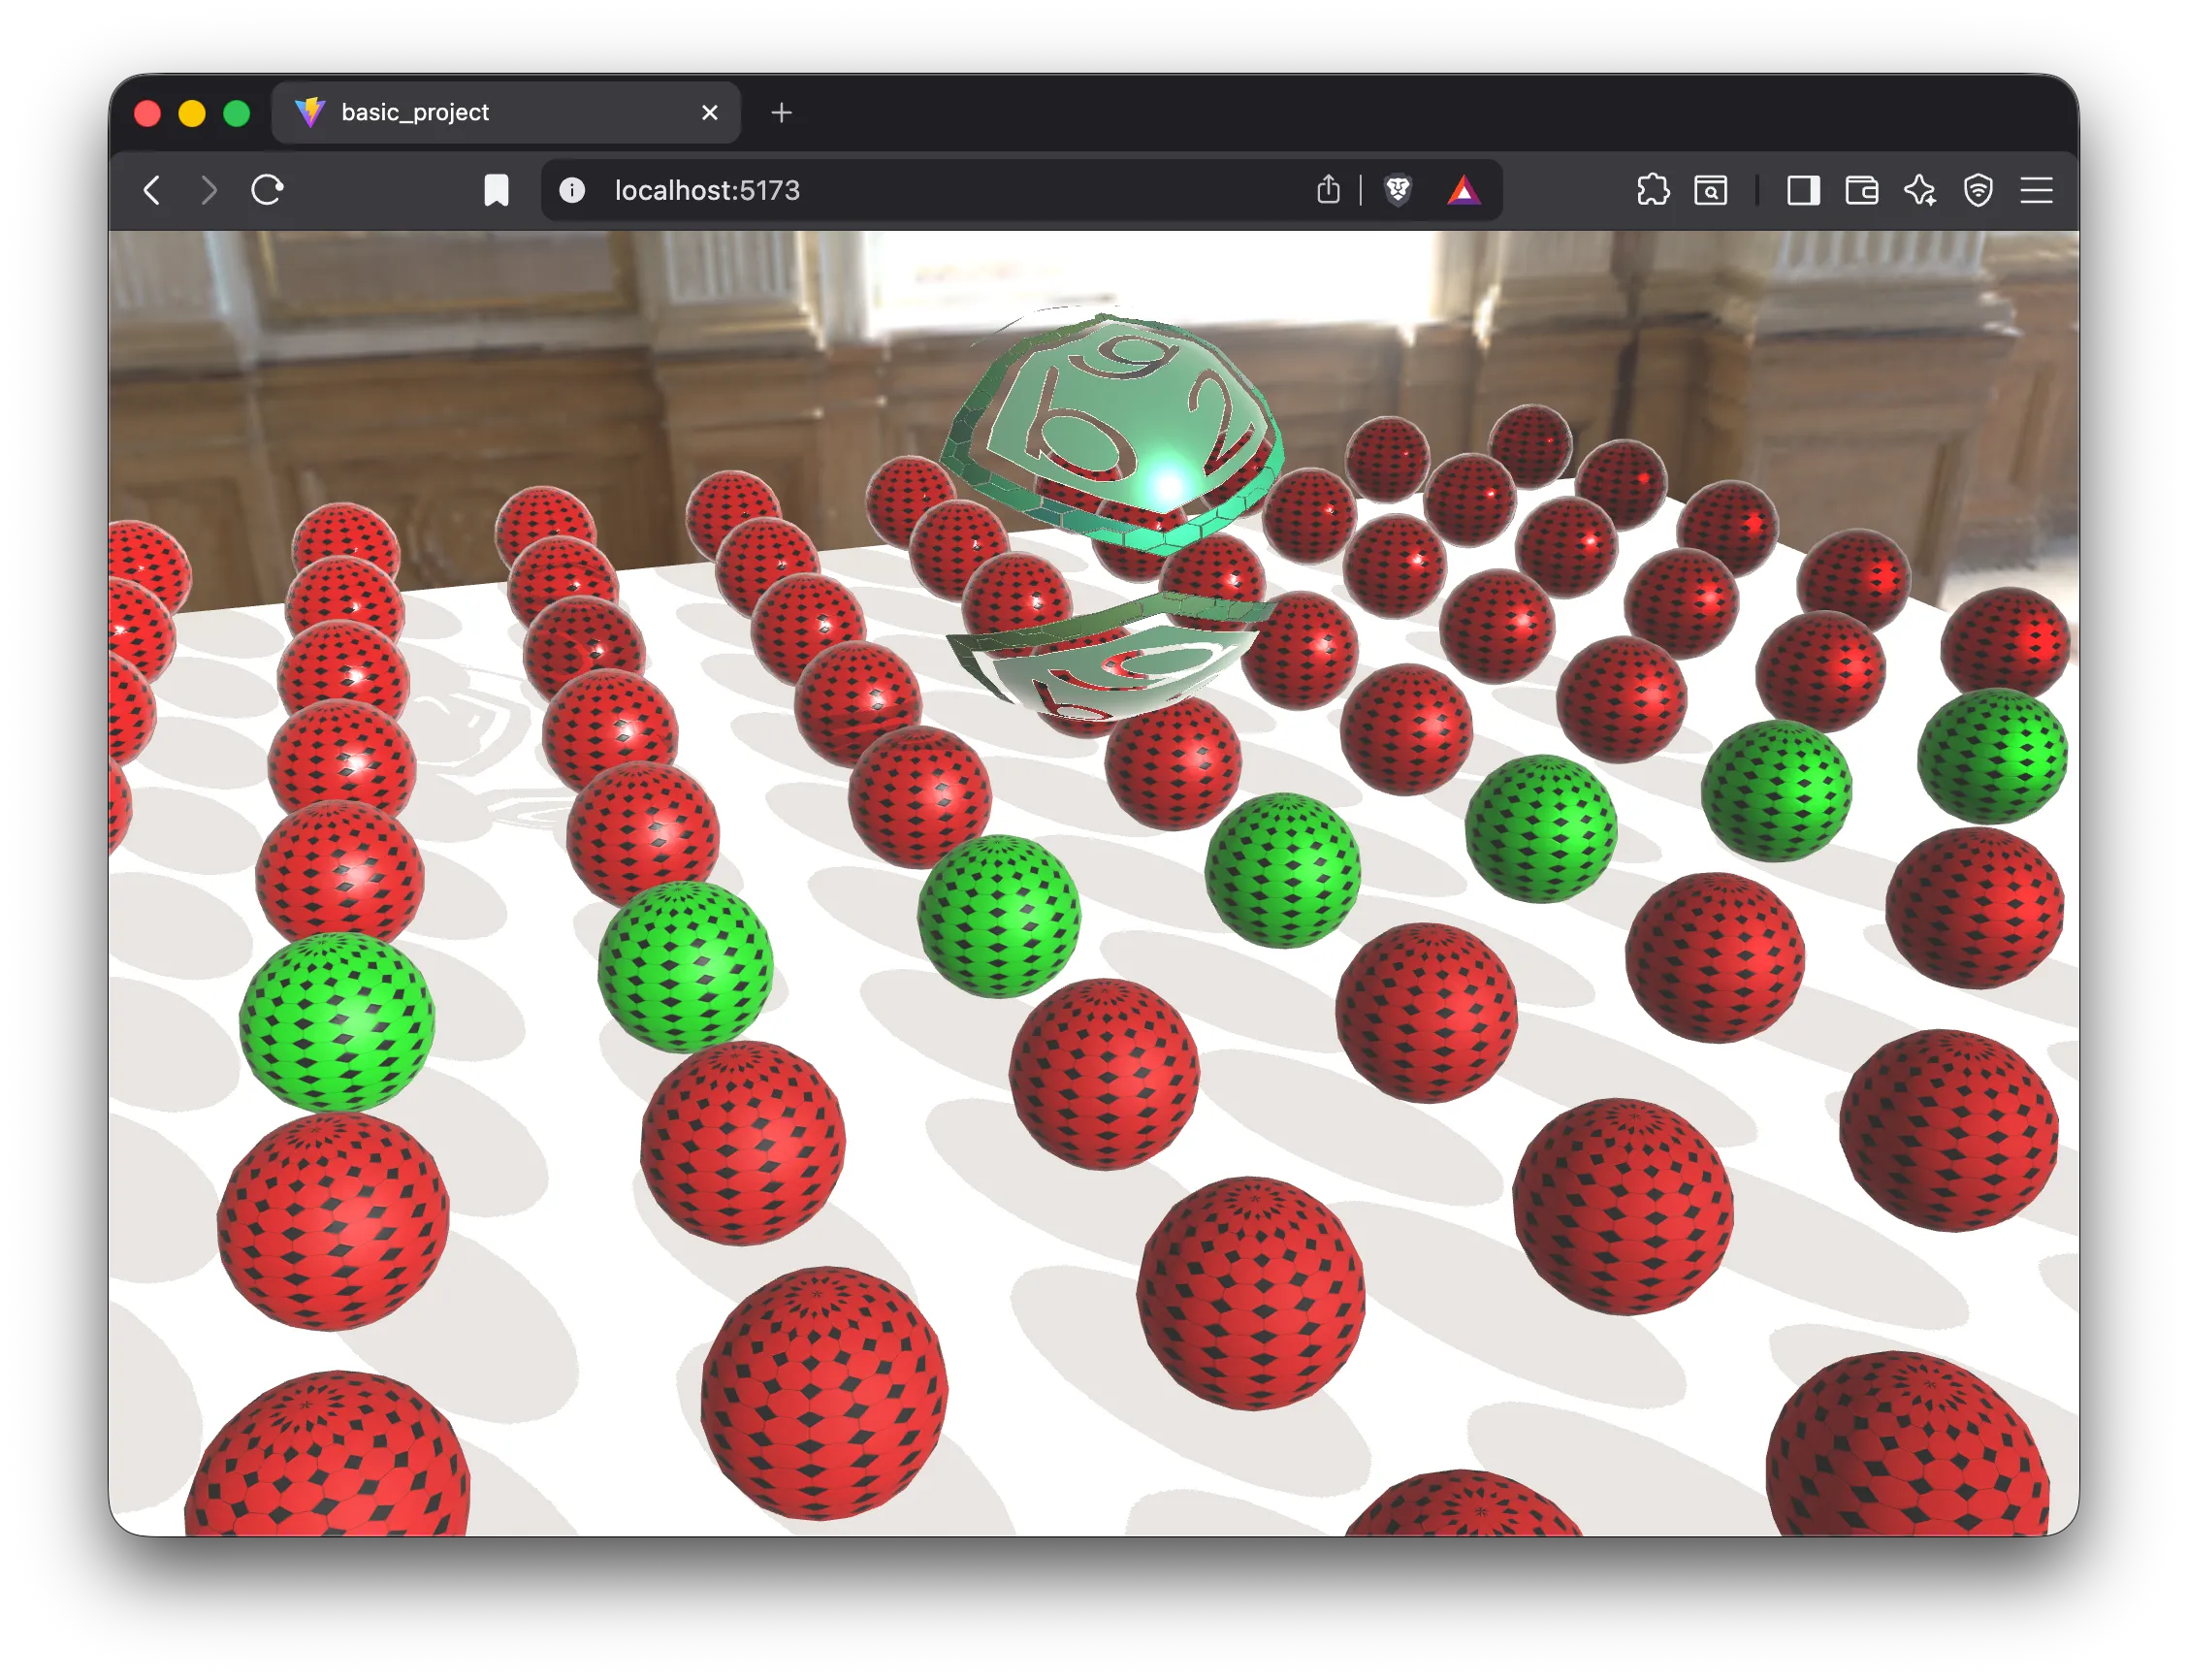
We can also add conditions in the search. For example, in the example code we’re assuming that the result contains a Drawable component. In this case it’s clear that it will work, because we generated the scene by code, but scene queries are usually performed on loaded scenes. We could check if a node contains a drawable before assigning the material, but it’s more efficient to add a condition to the search to ensure that the resulting nodes have a Drawable component. The FindNodeVisitor class also includes this functionality. The visitor configuration code would look like this:
const findVisitor = new FindNodeVisitor();findVisitor.name = /^Sphere\_5\_?/;findVisitor.hasComponents(["Drawable"]);It’s possible to reuse a visitor after a search. To do this, before starting a second search you have to call the clear() method to clear previous results and reconfigure the search parameters:
findVisitor.clear();findVisitor.name = "Scene Elements";findVisitor.hasComponents([]);sceneRoot.accept(findVisitor);const positions = findVisitor.result?.map(node => { return Transform.GetWorldMatrix(node).translation;});console.log(positions);8. Bonus
Section titled “8. Bonus”8.1. Direct component access
Section titled “8.1. Direct component access”We’ve seen that to obtain a component of a certain type from a node we use the component() function passing the component’s type identifier. To this function we have to apply a casting to the concrete type to indicate to TypeScript which specific component class we’re obtaining:
const drw = node.component("Drawable") as Drawable;if (drw) { // Do something with drw}For common component types, there are shorter specific functions that allow obtaining components with the casting already applied:
const trx = node.transform;const drw = node.drawable;const light = node.lightComponent;const camera = node.camera;8.2. Component access from other components
Section titled “8.2. Component access from other components”In many occasions we’ll also find ourselves with we have a component and we want to access another sibling component: that is, a component that belongs to the same node
const camera = Camera.GetMain(sceneRoot);if (camera) { const trx = camera.node.transform; // Do something with the camera's transformation}The base node.Component class contains direct access functions to obtain references to sibling components, which are named the same as the equivalent functions in Node. Therefore, running camera.node.transform is equivalent to running directly camera.transform. The same happens with any other arbitrary component type: camera.node.component("Transform") is equivalent to camera.component("Transform")